You Won’t Believe How Easy It Is to Clean Shower Grout Like New!
You won’t believe how easy it is to clean shower grout like new! Start by gathering supplies like a stiff-bristled brush, quality grout cleaner, or a DIY mix of baking soda and vinegar. Apply your solution, scrub the grout, rinse thoroughly, and dry the area to prevent mold. Regular maintenance keeps your grout looking fresh and extends tile life. With a few more handy tips, you’ll achieve a sparkling clean shower in no time!
Key Takeaways
- Use a simple mixture of baking soda and vinegar to effectively lift stains from grout without harsh chemicals.
- Scrub grout lines with a stiff-bristled brush for deep cleaning and to remove stubborn mold or mildew.
- Rinse thoroughly with warm water to ensure all residue is removed and to prevent future buildup.
- Establish a regular cleaning routine with weekly wipe-downs to maintain grout and keep it looking new.
- Inspect grout monthly for any signs of discoloration or damage, allowing for timely maintenance.
Understanding Shower Grout and Its Importance
Shower grout plays an essential role in keeping your bathroom looking fresh and clean. It acts as a sealant between tiles, preventing water from seeping behind them and causing damage. Proper grout cleaning not only enhances your bathroom’s appearance but also extends the lifespan of your tiles. When you neglect grout maintenance, you risk mold, mildew, and stubborn stains developing, which can be challenging to remove. Regularly using a DIY cleaning solution can significantly reduce mold growth and keep your grout looking new. Additionally, using simple cleaning tips can make the process more efficient and effective.
Incorporating natural cleaning solutions into your routine can also help prevent harmful mold and mildew from taking hold in your bathroom. Utilizing eco-friendly cleaning practices is a smart choice that benefits both your family and the environment. By understanding the importance of grout, you empower yourself to take proactive steps in maintaining your bathroom’s integrity. Regularly cleaning your grout with appropriate products guarantees it remains in top condition. Additionally, using natural cleaning ingredients can effectively combat mold growth and keep your grout looking new. Mastering grout cleaning techniques will help you achieve that pristine look while safeguarding your investment in your home. Don’t underestimate the power of clean grout!
Common Causes of Grout Discoloration
While many factors contribute to grout discoloration, a few common culprits stand out.
First, moisture is a primary issue; it creates an ideal environment for mold and mildew to thrive, leading to dark stains. Additionally, deep cleaning techniques can help eliminate mold and mildew growth before it stains your grout. Implementing a regular weekly cleaning routine can further inhibit mold growth by keeping surfaces dry and clean. Regular cleaning not only maintains hygiene but also helps in preventing buildup that can lead to discoloration. Using natural cleaning solutions, such as vinegar and baking soda, can also enhance your efforts in keeping surfaces sanitized.
Second, hard water deposits can accumulate, leaving unsightly mineral buildup that dulls your grout’s appearance.
Third, the use of harsh cleaning products may strip away protective sealants, making your grout more susceptible to staining from soap scum and dirt.
Finally, food and drink spills can cause significant discoloration, especially if not cleaned promptly.
By understanding these causes, you’re better equipped to tackle the problem and maintain your grout’s pristine condition. Implementing daily habits to reduce moisture can significantly help prevent future discoloration.
Recognizing the sources of discoloration is the first step toward effective cleaning.
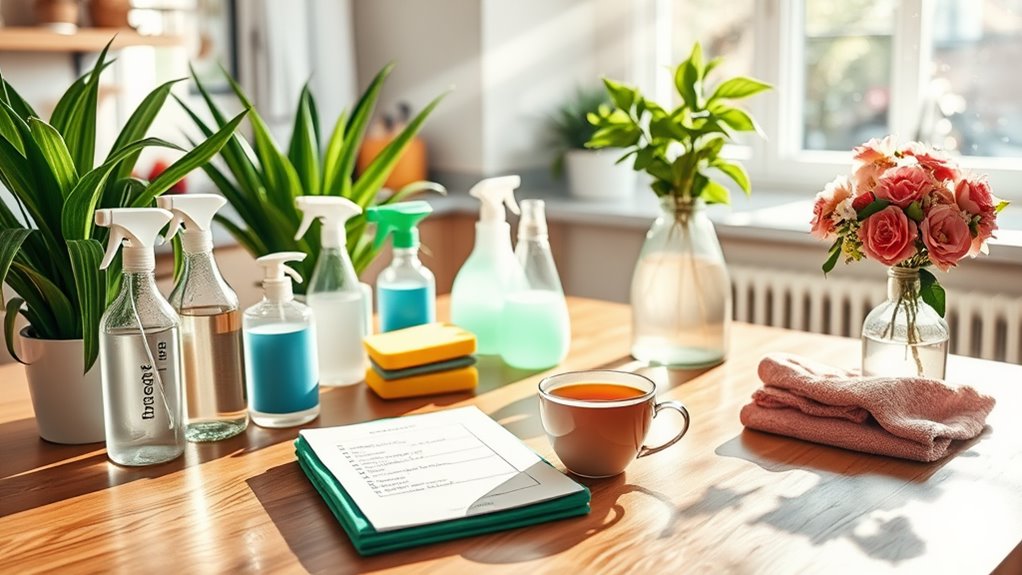
Essential Cleaning Supplies You’ll Need
To effectively clean your grout, you’ll need a few essential supplies that make the task easier and more efficient.
Start with a stiff-bristled brush; this’ll help you scrub away tough stains. Next, stock up on a quality grout cleaner or a DIY mixture of baking soda and vinegar, which can tackle grime effectively. Using natural ingredients is not only effective but also safe for your home environment. Additionally, consider using eco-friendly cleaners to minimize your exposure to harsh chemicals while achieving a deep clean. Homemade cleaners can also be more cost-effective than commercial alternatives. For optimal results, incorporate eco-friendly bathroom cleaners that utilize safe and natural ingredients.
A spray bottle’s handy for applying your cleaner evenly. Don’t forget gloves to protect your hands, and a sponge for wiping down surfaces afterward.
Finally, a bucket is useful for rinsing and mixing solutions. With these supplies in hand, you’ll be well-equipped to restore your shower grout to its former glory, ensuring a pristine and inviting space. Remember, following the best order of tasks is key to achieving a spotless result efficiently.
Prepare to impress yourself with the results!
Preparing Your Shower for Cleaning
Before diving into your cleaning routine, make certain you’ve cleared the shower of any personal items like shampoos, soaps, and loofahs. This step’s vital for a thorough clean. Next, check for any visible mold or mildew spots; these need extra attention. To further prepare, gather your supplies and guarantee your workspace is well-ventilated.
Here’s a quick checklist to follow:
| Task | Description | Status |
|---|---|---|
| Clear Personal Items | Remove all products | Not Started |
| Inspect for Mold | Look for dark spots | Not Started |
| Ventilation | Open windows or use a fan | Not Started |
| Gather Supplies | Collect all necessary tools | Not Started |
| Prepare Water | Set up hot water for rinsing | Not Started |
Completing these tasks sets you up for successful grout cleaning!
Step-by-Step Grout Cleaning Process
With your shower prepared and all personal items cleared away, it’s time to tackle the grout cleaning process.
Start by applying your chosen cleaning solution to the grout lines. Let it sit for a few minutes, allowing the formula to penetrate and loosen dirt.
Next, grab a stiff-bristled brush and scrub the grout vigorously, focusing on stubborn areas. Rinse the brush frequently to avoid spreading grime.
Once you’ve scrubbed every inch, rinse the grout thoroughly with warm water. For any remaining stains, repeat the process as needed.
Finally, dry the area with a clean cloth to prevent mold growth. Stand back and admire your hard work—the grout should look rejuvenated and fresh!
DIY Cleaning Solutions vs. Store-Bought Products
When it comes to cleaning shower grout, you might wonder whether to go for DIY solutions or store-bought products.
Let’s compare the cost-effectiveness of each option and take a closer look at the safety of their ingredients.
Choosing the right approach can save you money and guarantee a healthier environment.
Cost-Effectiveness Comparison
While you might think store-bought cleaning products offer the best results for tackling shower grout, DIY solutions can often provide a more budget-friendly alternative. By using common household items, you can achieve excellent results without breaking the bank.
| Cleaning Method | Estimated Cost |
|---|---|
| Store-Bought Products | $5 – $15 |
| DIY Solutions (e.g., vinegar, baking soda) | $1 – $5 |
When you weigh the costs, it’s clear that DIY methods not only save you money but also allow greater control over what you use. Plus, you can experiment with different combinations for ideal results. Mastering these techniques will leave your grout sparkling without the hefty price tag.
Ingredient Safety Analysis
How safe are the ingredients in your cleaning solutions? When weighing DIY cleaning solutions against store-bought products, you need to take into account ingredient safety.
Many DIY options use simple, non-toxic ingredients like vinegar, baking soda, and essential oils, making them appealing for those conscious of chemical exposure. However, check for allergies or sensitivities, as even natural ingredients can cause reactions.
On the other hand, store-bought products often contain harsher chemicals, which can pose health risks if inhaled or absorbed through the skin. While they may be effective, their safety is sometimes questionable.
Mastering your cleaning strategy means knowing your ingredients and choosing what aligns with your health priorities. Ultimately, opting for safer ingredients empowers you to maintain a clean, healthy home.
Tips for Achieving the Best Results
To achieve the best results when cleaning shower grout, gather your supplies before you start.
Having everything on hand will streamline your process and guarantee you don’t miss a step.
Here are some essential tips to master grout cleaning:
-
Choose the Right Cleaner****: Select a cleaner that’s effective for your grout type.
-
Use a Quality Brush****: A stiff-bristled brush can penetrate deeper into the grout lines for a thorough clean.
-
Apply Even Pressure****: Scrub gently but consistently to avoid damaging the grout while confirming dirt is lifted.
-
Rinse Thoroughly: After scrubbing, rinse well with warm water to remove residue and prevent buildup.
Follow these steps, and your shower grout will look like new in no time!
Preventative Maintenance for Long-Lasting Grout
To keep your grout looking great for years, you need a regular cleaning schedule.
Don’t forget to apply a sealant after cleaning to protect it from stains and moisture.
With these simple steps, you’ll guarantee your grout stays in top shape.
Regular Cleaning Schedule
Establishing a regular cleaning schedule is essential for maintaining your shower grout in top condition.
By incorporating consistent practices, you’ll prevent dirt and mold buildup, ensuring your grout remains pristine.
Here’s a simple routine to follow:
-
Weekly Wipe-Down: Use a damp cloth or sponge to wipe grout lines after each shower.
-
Bi-Weekly Deep Clean: Apply a specialized grout cleaner and scrub with a brush to eliminate stains.
-
Monthly Inspection: Check for any signs of mold or mildew and address them promptly.
-
Seasonal Maintenance: Dedicate time every few months to perform a thorough deep clean, including hard-to-reach areas.
Sealant Application Tips
While regular cleaning is vital, applying a sealant can greatly enhance the longevity of your shower grout.
Start by choosing a high-quality grout sealant designed for wet areas. Before application, make certain your grout is completely dry and clean. This step is essential; any moisture can hinder sealant adhesion.
Use a small brush or applicator for precise application, working it into the grout lines without over-saturating. Allow the sealant to set as per the manufacturer’s instructions, typically a few hours.
After sealing, avoid using the shower for at least 24 hours to guarantee complete curing. Finally, reapply the sealant every 6 to 12 months for maximum protection, keeping your grout looking fresh and clean.
Frequently Overlooked Areas in Shower Grout
Have you ever noticed how easily grime can accumulate in the most unexpected spots of your shower grout?
While you might regularly clean the obvious areas, some spots often get overlooked.
Pay attention to these frequently neglected areas:
-
Corners: Grime loves to hide in the tight spaces where walls meet.
-
Around Fixtures: Check behind faucets and handles where water splashes frequently.
-
Bottom Edges: The base of tiles can trap soap scum and debris.
-
Shower Caddies: These can harbor mold and mildew beneath them.
Transforming Your Shower: Before and After Results
Transforming your shower can lead to stunning visual results that make all the difference.
You’ll see just how effective a step-by-step cleaning process can be with the right essential products.
Let’s explore the dramatic before and after changes that will inspire your own cleaning journey.
Stunning Visual Transformations
When you take a moment to compare the before and after images of a freshly cleaned shower, the difference can be nothing short of jaw-dropping.
You’ll witness a transformation that not only enhances the aesthetic appeal but also elevates your entire bathing experience.
Here are four striking changes you’ll likely notice:
-
Vibrant Colors: Grout returns to its original hue, making tiles pop.
-
Increased Brightness: A well-cleaned shower radiates light, creating an inviting atmosphere.
-
Improved Hygiene: Removing dirt and grime means a healthier space for you and your family.
-
Enhanced Value: A pristine shower can greatly boost your home’s appeal.
These stunning visual transformations demonstrate the power of a thorough cleaning, inspiring you to take action!
Step-by-Step Process
Cleaning your shower grout doesn’t have to be an intimidating task; in fact, with a simple step-by-step process, you can achieve impressive results.
First, gather your cleaning supplies. Next, apply your chosen cleaner to the grout lines, ensuring even coverage. Allow it to sit for a few minutes to break down dirt and stains.
Then, scrub the grout with a stiff brush, focusing on tough spots. Rinse the area thoroughly with warm water to remove any residue. For stubborn stains, repeat the process as needed.
Finally, dry the grout with a clean cloth to prevent moisture buildup. After these steps, you’ll see a remarkable transformation in your shower, elevating your space to a level of cleanliness you’ll be proud of!
Essential Cleaning Products
To achieve stunning before and after results in your shower, having the right cleaning products is essential. Equip yourself with these must-haves to master your grout cleaning game:
-
Baking Soda: A powerful, natural abrasive that lifts stains without scratching.
-
White Vinegar: Cuts through soap scum and mineral deposits with ease.
-
Hydrogen Peroxide: A potent disinfectant that brightens grout and tackles mildew.
-
Grout Brush: An essential tool with stiff bristles to reach into crevices effectively.
With these products in hand, you’ll be well on your way to transforming your shower.
The right combination not only enhances your cleaning power but also guarantees your grout looks as good as new.
Get ready to impress!
Frequently Asked Questions
How Often Should I Clean My Shower Grout?
You should clean your shower grout at least once a month to prevent buildup and stains. For high-use bathrooms, consider weekly maintenance. Regular cleaning keeps your grout looking fresh and extends its lifespan considerably.
Can I Use Bleach to Clean Grout Safely?
You can use bleach to clean grout safely, but be cautious. Always dilute it with water, wear gloves, and guarantee proper ventilation. Test a small area first to avoid damaging your grout or surrounding materials.
Is Sealant Necessary After Cleaning Grout?
Yes, applying sealant after cleaning grout is essential. It protects against stains and moisture, prolonging the grout’s lifespan. Make sure you choose a quality sealant and follow the manufacturer’s instructions for the best results.
What Tools Can I Use for Stubborn Stains?
For stubborn stains, you’ll need a stiff-bristled brush, a grout cleaner or baking soda paste, and a spray bottle for vinegar. These tools help you tackle tough grime effectively, restoring your grout to its original state.
Will Cleaning Grout Damage My Tiles?
Cleaning grout won’t damage your tiles if you use the right techniques and tools. Avoid harsh chemicals and abrasive scrubbers; instead, opt for gentle cleaners and soft brushes to protect your tile surfaces effectively.