This Dollar5 DIY Glass Cleaner Beats Anything From the Store
This $5 DIY glass cleaner beats any store-bought option because it delivers streak-free results without harmful chemicals. Made with simple ingredients like white vinegar and distilled water, it’s safe for your family and pets. Plus, it’s more budget-friendly and customizable to your preferences. You’ll enjoy a sparkling finish while being eco-friendly. Want to uncover more benefits and tips for using this effective cleaner? Stick around to learn how to maximize your glass cleaning experience!
Key Takeaways
- This DIY glass cleaner costs around $5 for several gallons, significantly cheaper than store-bought options priced at $5-$10 per bottle.
- Made with eco-friendly ingredients like vinegar and water, it’s safe for families and pets without harmful chemicals.
- The cleaner effectively reduces streaks and residue, providing cleaning results comparable to commercial products.
- Customizable with essential oils, this cleaner allows for personal preferences while promoting sustainable cleaning practices.
- Versatile for various surfaces, it works well on windows, mirrors, and other household items, enhancing overall cleanliness.
The Benefits of Homemade Glass Cleaner
When you choose homemade glass cleaner, you not only save money but also create an eco-friendly solution for your home. This cheap cleaner eliminates harsh chemicals found in commercial products, reducing your environmental impact. Additionally, homemade glass cleaner can be just as effective as commercial cleaners when made with the right ingredients. Using natural ingredients ensures that your solution is safe and effective for all surfaces.
One key component to consider is vinegar’s effectiveness, which acts as a natural degreaser and helps to cut through grime. You gain control over the ingredients, ensuring they’re safe for your family and pets. Furthermore, many homemade cleaners, including your glass cleaner, can also be used on various surfaces like kitchen appliances, enhancing their versatility. Additionally, making your own cleaner allows you to customize it according to your preferences, enhancing effectiveness based on your specific needs. You’ll find that it’s easy to whip up, requiring minimal effort and time. By mastering this simple DIY project, you empower yourself with a sustainable cleaning option that rivals store-bought alternatives. Furthermore, using natural ingredients ensures that you are employing eco-friendly solutions that benefit both your home and the planet.
Embrace the satisfaction of using a product you’ve crafted, knowing it’s both effective and environmentally conscious.
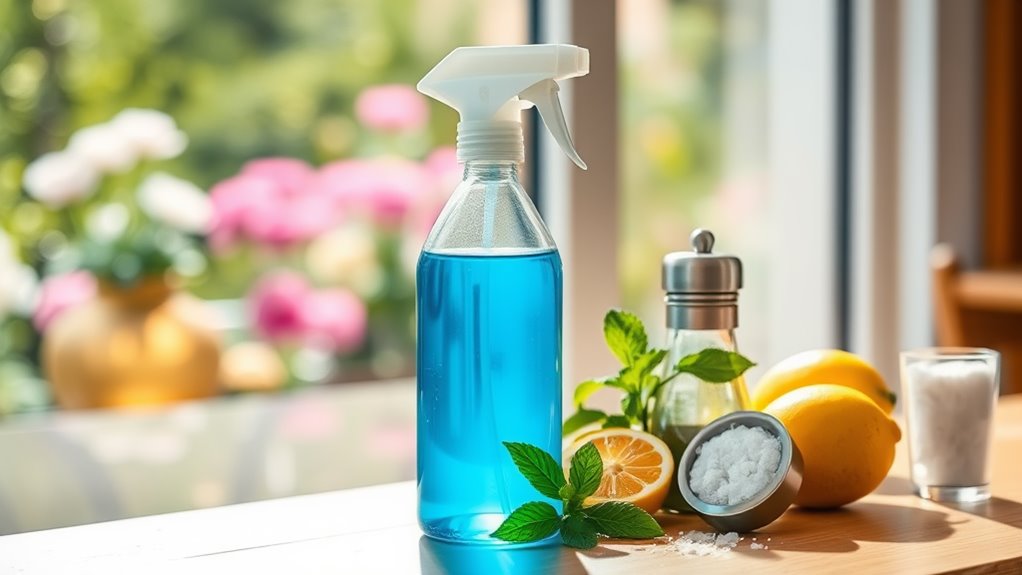
Ingredients You’ll Need
To create your own effective glass cleaner, you’ll need just a few simple ingredients.
This DIY concoction not only saves you money but also gives you control over what goes into your cleaning products.
Gather these essential items to start your journey toward spotless surfaces:
-
White vinegar: A natural and powerful degreaser that cuts through grime with ease. It is also known for its disinfecting properties, making it a great choice for cleaning various surfaces. Additionally, vinegar can act as a natural deodorizer to keep your space smelling fresh. Vinegar is also a key component in making an eco-friendly all-purpose cleaner.
-
Distilled water: This guarantees no minerals leave streaks on your glass, providing a crystal-clear finish.
-
Cornstarch: A little-known secret that enhances your cleaner’s effectiveness and reduces streaks. Using a vinegar-based solution can also be beneficial for various surfaces beyond glass.
Vinegar is a versatile cleaning agent that can be used for various surfaces, making it an excellent choice for an all-purpose natural cleaner.
With these ingredients, you’re well on your way to mastering the art of glass cleaning.
Prepare to be amazed at the results, and enjoy the satisfaction of creating something effective and eco-friendly!
Step-by-Step Instructions
Now that you’ve gathered your ingredients, it’s time to mix them together for your DIY glass cleaner. We’ll walk you through the mixing process and share some application techniques to guarantee your windows shine. Let’s get started! To achieve a truly streak-free finish, consider using a microfiber cloth for optimal results. Additionally, using common kitchen ingredients like vinegar can enhance cleaning power and leave your glass surfaces gleaming. It’s important to remember that many commercial cleaners can be harmful to surfaces, so opting for safer, natural alternatives is a wise choice for preserving your countertops. Before applying your glass cleaner, be sure to pre-dust your mirrors, as this crucial step helps prevent smeared surfaces and maximizes the effectiveness of your cleaning solution. Using essential oils in your cleaning solution not only adds a pleasant scent but also provides natural disinfectant properties, making it a great addition to your DIY cleaner.
Gather Your Ingredients
Gathering your ingredients for a DIY glass cleaner is a quick and simple process. You’ll want to make sure you have everything ready before you start crafting your cleaner. Here’s what you need:
-
White vinegar: This natural ingredient cuts through grime and streaks like a pro.
-
Water: Essential for diluting the vinegar, making certain a balanced solution.
-
Spray bottle: A must-have for easy application and storage of your cleaner.
With these three items in hand, you’re well on your way to mastering the art of glass cleaning.
This homemade solution isn’t only effective but also budget-friendly, proving that you don’t need commercial products for sparkling windows and mirrors.
Get ready to enjoy your perfectly clear surfaces!
Mixing Process Explained
Once you’ve gathered your ingredients, it’s time to mix them together for your DIY glass cleaner.
Start by measuring one cup of distilled water and pour it into a clean spray bottle. Next, add one cup of white vinegar; this will help cut through grime and provide a streak-free shine.
If you want, toss in a few drops of essential oil for a pleasant scent—lavender or lemon works great.
Secure the spray bottle’s top and give it a good shake to combine everything thoroughly. Make sure the mixture is well-blended, as this guarantees peak cleaning power.
Now, you’ve created an effective glass cleaner that’s both economical and environmentally friendly. You’re ready for the next step!
Application Techniques Tips
To achieve a spotless finish on your windows, start by choosing the right time of day for cleaning. Early morning or late afternoon is ideal, as the sun won’t cause the cleaner to dry too quickly.
Follow these application techniques for best results:
-
Use a microfiber cloth****: It traps dirt and prevents streaks, giving a polished look.
-
Apply in sections: Work top to bottom to catch drips and guarantee even coverage.
-
Buff with a dry cloth: After applying your cleaner, use a separate dry cloth to buff the surface for that final shine.
How This Cleaner Compares to Store-Bought Options
While you might be tempted to reach for a store-bought glass cleaner, DIY options often deliver comparable results without the harsh chemicals.
Your homemade cleaner, using common ingredients like vinegar and water, effectively cuts through grime and leaves surfaces sparkling. Many commercial products contain ammonia and artificial fragrances, which can irritate your senses and the environment.
Plus, your DIY solution is cost-effective—just a few dollars compared to pricey brands. With a little practice, you’ll master the right ratios for your preferred shine.
You’ll find that the streaks and residue often left by store-bought cleaners are minimized with your own blend, giving you better control over the cleaning process and results.
Embrace this eco-friendly alternative for a truly satisfying clean.
Tips for Streak-Free Shine
Achieving a streak-free shine isn’t just about the cleaning solution; it’s also about your technique. Mastering the art of glass cleaning requires attention to detail and a few simple tricks.
Follow these tips to elevate your results:
-
Use a microfiber cloth****: It traps dirt and moisture better than paper towels, ensuring a smoother finish.
-
Clean in a circular motion****: This technique helps distribute the cleaner evenly and reduces the risk of streaks.
-
Avoid direct sunlight: Cleaning glass in bright sunlight can cause the solution to dry too quickly, leading to streaks.
Eco-Friendly Advantages
Using eco-friendly glass cleaners not only benefits the environment but also enhances your cleaning experience. When you choose natural ingredients, you’re reducing harmful chemicals that can pollute air and water. This choice protects your health, minimizing exposure to irritants and toxins found in conventional cleaners.
Plus, these DIY solutions often rely on items you already have at home, reducing waste and promoting sustainability.
You’ll find that eco-friendly glass cleaners perform remarkably well, delivering a streak-free shine without harsh residues. As you master this process, you’ll appreciate the satisfaction of using safer products while achieving impeccable results.
Cost Breakdown
Opting for DIY glass cleaners not only benefits the environment but also saves you money.
When you break down the costs, you’ll find that creating your own cleaner is remarkably economical. Here’s how it stacks up:
- Vinegar: A bottle costs around $3 and lasts for multiple batches.
- Water: Practically free, especially if you use tap water.
- Essential Oils: A small bottle can be around $5, but you’ll only use a few drops per mix.
In total, you’re looking at about $5 for several gallons of cleaner, compared to the $5-$10 you’d spend on a single store-bought bottle.
Mastering this simple recipe not only empowers you but also keeps your wallet happy.
Additional Uses for Your DIY Cleaner
Your DIY glass cleaner isn’t just for windows; it can really shine in various areas of your home.
You’ll love how it effectively cleans multiple surfaces and eliminates unwanted odors, leaving everything fresh and sparkling.
Let’s explore some additional ways to make the most of your cleaner!
Streak-Free Shine
While many people rely on commercial cleaners for their glass surfaces, a DIY glass cleaner can deliver a streak-free shine that’s just as effective, if not better.
With the right ingredients, you’ll achieve that crystal-clear finish you’ve always wanted.
Here are some additional uses for your DIY cleaner:
-
Mirrors: Keep your mirrors spotless and reflective.
-
Windows: Eliminate smudges and enhance your view.
-
Screens: Safely clean your device screens without damage.
Multi-Surface Cleaning
Not only is your DIY glass cleaner perfect for windows and mirrors, but it also excels at tackling various surfaces around the home. You can confidently use it on countertops, tables, and even bathroom fixtures. Its powerful formula cuts through grime and grease, leaving surfaces spotless without harsh chemicals.
Just spray and wipe with a microfiber cloth for a quick clean that shines. Additionally, it’s safe for most appliances, making it an excellent choice for stainless steel or ceramic finishes. You’ll appreciate how effectively it removes smudges and fingerprints, keeping your home looking pristine.
With this versatile cleaner in hand, you’re equipped to maintain a sparkling environment effortlessly. Embrace the mastery of multi-surface cleaning with your budget-friendly solution!
Odor Elimination
Odor elimination is another fantastic benefit of your DIY glass cleaner. Not only does it leave surfaces sparkling, but it also neutralizes unpleasant smells throughout your home.
Harness the power of natural ingredients to tackle odors effectively.
- Freshen up your fridge by wiping down shelves.
- Eliminate pet odors by spraying on fabrics and upholstery.
- Revitalize stale air in your car with a quick spritz.
Using your glass cleaner for odor elimination is a simple yet powerful choice. You’ll not only master the art of cleaning but also create a fresher environment.
Embrace this dual-purpose solution and transform your space into a haven of cleanliness and pleasant aromas. Your home deserves that level of mastery!
Frequently Asked Questions
Can I Use This Cleaner on Tinted Windows?
You can use this cleaner on tinted windows, but be cautious. Always test a small, inconspicuous area first to verify it doesn’t damage or strip the tint. Proper care keeps your windows looking great.
How Long Does the Cleaner Last Once Mixed?
Once mixed, the cleaner lasts about two weeks if stored in a cool, dark place. Just make certain to shake it well before each use to guarantee its effectiveness, and you’ll maintain ideal results.
Is This Cleaner Safe for Pets and Children?
Yes, this cleaner’s safe for pets and children when used correctly. Just guarantee it’s fully dried before they come into contact with surfaces. Always supervise to prevent any accidental ingestion or mishaps during cleaning.
Can I Add Essential Oils for Fragrance?
Absolutely, you can add essential oils for fragrance! Just a few drops will enhance the scent without affecting the cleaner’s effectiveness. Experiment with different oils to find your favorite aroma while keeping your surfaces sparkling clean.
What Should I Do if the Cleaner Leaves Streaks?
If your cleaner leaves streaks, try using a microfiber cloth for application and buffing. Make certain you’re using the right ratios of ingredients, and clean your surface in sections to avoid drying too quickly.