My Secret Weapon for Sparkling Kitchen Floors Without a Mop
Your secret weapon for sparkling kitchen floors without a mop is a simple spray bottle filled with a warm water and pH-balanced cleaner mix. Add white vinegar for tough stains. Clear your space first, then lightly mist the floor and wipe with a microfiber cloth in a circular motion. For stubborn stains, treat them with a pH-balanced solution or vinegar mix. This technique saves time and guarantees a streak-free finish. Stick around for more tips on maintaining that shine!
Key Takeaways
- Use a spray bottle with a pH-balanced cleaner for targeted cleaning without a mop, applying in a fine mist.
- Wipe the floor with a microfiber cloth in a circular motion for effective dirt removal and streak-free results.
- For stubborn stains, apply a vinegar-water mix directly to the stain and scrub gently with a soft-bristle brush.
- Clear the area of clutter and furniture to promote efficient cleaning and prevent dirt buildup during your cleaning session.
- Enhance the process by using essential oils in your cleaning solution for a pleasant aroma while cleaning.
The Importance of Clean Kitchen Floors
While you mightn’t think about it often, clean kitchen floors are essential for both hygiene and aesthetics. A spotless floor not only enhances the overall look of your kitchen but also reduces the risk of bacteria and allergens. Regularly using a mop-free method can save you time and effort while achieving the same sparkling results. You wouldn’t want contamination from food particles lurking in the corners, right? Implementing a simple floor hack can make all the difference. Try using a mixture of vinegar and water for a quick clean-up that cuts through grime without harsh chemicals. This method’s not only effective but also environmentally friendly, as it utilizes non-toxic ingredients to create a safe cleaning solution. Additionally, using natural sanitizers can help eliminate any lingering germs and ensure a truly clean surface. Incorporating steam cleaning can further enhance the cleaning process by using high-temperature steam to disinfect and remove stubborn stains. Using an eco-friendly cleaner can also contribute to a healthier indoor environment. Regular maintenance keeps your floors looking pristine and extends their lifespan. So, embrace the importance of clean kitchen floors; your health and home will thank you for it.
Understanding Your Kitchen Floor Type
To keep your kitchen floors sparkling, you need to understand the type of flooring you have. Each material, whether it’s tile, hardwood, or laminate, comes with its own set of care requirements. Knowing these characteristics will help you choose the best cleaning methods for a spotless shine. Additionally, it’s important to consider preventive maintenance tips to ensure your flooring remains in top condition over time. Using eco-friendly cleaning solutions can further enhance the longevity of your floors while keeping your home safe from harsh chemicals. Incorporating natural sanitizing methods can also help eliminate bacteria and keep your kitchen safe. For example, using a mixture of vinegar and water can serve as an effective eco-friendly solution for maintaining the shine on various floor types. Regularly applying natural sanitizing techniques can help reduce the presence of harmful germs on your surfaces.
Tile Floor Characteristics
Understanding the characteristics of your tile floor is essential for maintaining its shine and longevity. Knowing what type of tile you have helps you choose the right cleaning techniques and products.
Here are some key features to contemplate:
- Material: Ceramic, porcelain, or natural stone—each has unique care requirements.
- Texture: Smooth tiles are easier to clean, while textured surfaces can trap dirt.
- Finish: Glossy tiles reflect light and may show scratches; matte finishes hide imperfections but can be harder to clean.
- Grout: The color and type of grout can affect the appearance and cleaning needs of your tile.
Grasping these characteristics allows you to tailor your maintenance approach, ensuring your kitchen floors remain stunning and durable.
Hardwood Maintenance Tips
Hardwood floors bring warmth and elegance to your kitchen, but they require specific care to keep them looking their best.
Start by regularly sweeping or vacuuming to remove dirt and debris that can scratch the surface. Use a damp cloth or hardwood cleaner to tackle spills immediately, preventing stains.
For deeper cleaning, a microfiber mop lightly dampened with a suitable hardwood cleaner can work wonders. Avoid harsh chemicals or excessive water, as they can warp or damage the wood.
Consider applying a protective finish every few years to maintain luster and durability.
Finally, place rugs in high-traffic areas to minimize wear. With these tips, you’ll guarantee your hardwood floors remain a stunning centerpiece in your kitchen.
Laminate Care Essentials
While laminate floors offer a stylish and budget-friendly option for your kitchen, caring for them properly is essential to maintain their appearance and longevity.
Here’s how to master laminate care:
-
Regular Dusting: Use a microfiber cloth or broom to remove dust and debris that can scratch your floor.
-
Gentle Cleaning Solution: Mix a few drops of dish soap with warm water for a safe, effective cleaner.
-
Avoid Excess Water: Never soak your laminate; use a damp cloth instead to prevent warping.
-
Quick Spill Response: Wipe up spills immediately to avoid staining and damage.
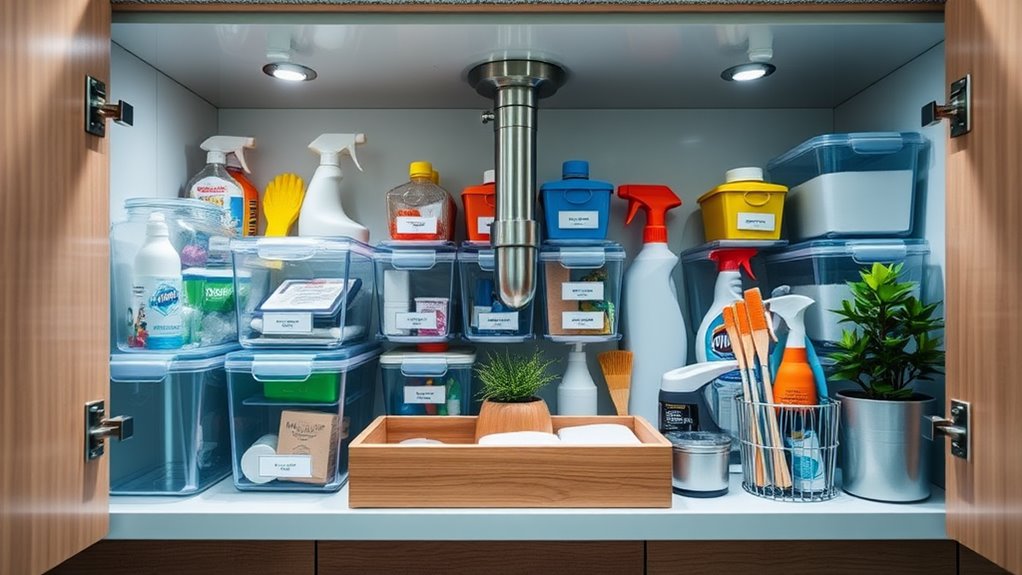
Essential Household Items for Cleaning
To keep your kitchen floors sparkling, you’ll want to have a few essential cleaning items on hand.
A vinegar and water solution is a fantastic natural cleaner, while a baking soda paste can tackle tough stains with ease. Additionally, using a DIY countertop cleaning spray can effectively sanitize your surfaces while being safe for your family. Don’t forget to add essential oil boosters for a fresh scent that makes cleaning more enjoyable! Moreover, using an eco-friendly all-purpose cleaner can help maintain the shine on your kitchen appliances while avoiding harsh chemicals. Interestingly, vinegar’s natural acidity makes it effective at breaking down tough grime without the need for synthetic chemicals. Additionally, incorporating citrus peels into your cleaning routine can enhance the effectiveness of your natural cleaners and leave a pleasant aroma in your kitchen. Vinegar’s ability to remove stains from various surfaces also makes it a versatile choice for tackling everyday messes.
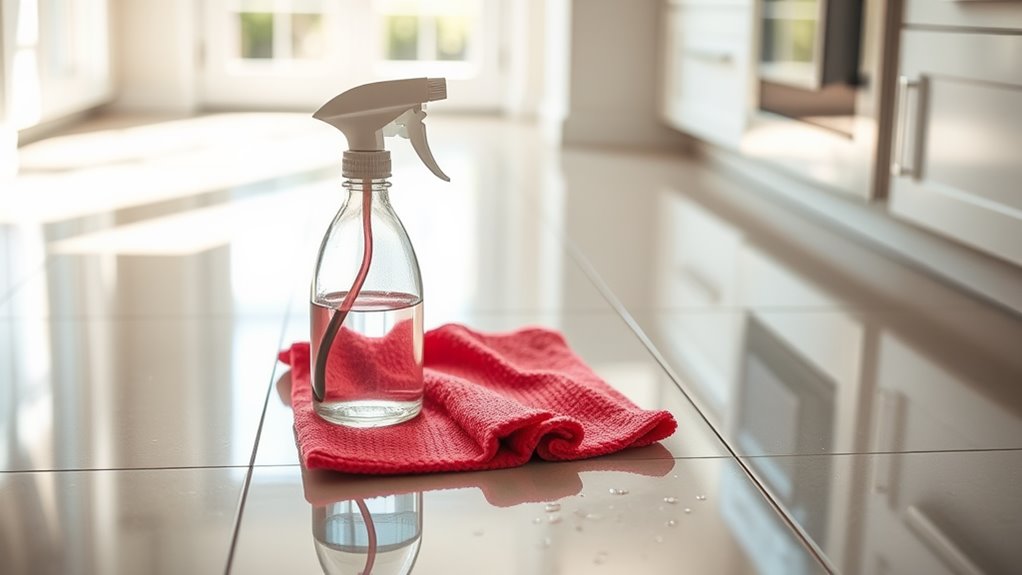
Vinegar and Water Solution
One simple and effective way to clean your kitchen floors is by using a vinegar and water solution.
This powerful mixture not only cuts through grease but also leaves your floors sparkling.
Here’s how to create and use it:
- Mix equal parts of white vinegar and warm water in a spray bottle.
- Spray the solution directly onto your floors, focusing on stubborn stains.
- Use a microfiber cloth or sponge to wipe away dirt and grime.
- For a fresh scent, add a few drops of essential oil to the mixture.
With this simple solution, you’ll master the art of maintaining clean kitchen floors without the hassle of a mop!
Enjoy the satisfaction of a spotless, inviting space.
Baking Soda Paste
If you want a powerful yet gentle cleaner for your kitchen floors, baking soda paste is a fantastic choice.
Simply mix baking soda with a little water to form a thick paste. This versatile cleaner effectively tackles grease, grime, and stubborn stains without scratching your floor’s surface.
Apply the paste directly to problem areas, and let it sit for about 10 minutes to break down dirt. Then, use a damp cloth or sponge to gently scrub the area, revealing a sparkling finish.
Rinse the surface with clean water to remove any residue. This method not only keeps your floors looking pristine but also harnesses the natural cleaning power of baking soda, making it a true kitchen essential.
Essential Oil Boosters
While many cleaners can leave your kitchen smelling fresh, essential oil boosters take it a step further by infusing your space with delightful aromas and added cleaning power.
These potent oils not only enhance your cleaning routine but also create an inviting atmosphere. To harness their benefits, consider these essential oils:
-
Tea Tree Oil: Known for its antimicrobial properties, it effectively combats germs.
-
Lemon Oil: This natural degreaser cuts through sticky residues and brightens surfaces.
-
Lavender Oil: Its calming scent adds tranquility and has antibacterial properties.
-
Peppermint Oil: This invigorating scent energizes your space while also repelling pests.
Add a few drops to your cleaning solution, and watch your kitchen transform into a sparkling, aromatic haven!
Preparing Your Cleaning Solution
Creating the perfect cleaning solution is essential for achieving sparkling kitchen floors.
Begin with a base of warm water in a bucket, ideally around a gallon, to guarantee maximum coverage. Next, add your choice of a gentle, pH-balanced cleaner—about a quarter cup should suffice.
For an extra boost, incorporate a few drops of your favorite essential oil to infuse a pleasant aroma during cleaning. If you’re tackling tough stains, consider adding a tablespoon of white vinegar, which works wonders for cutting grease.
Stir the mixture well, making certain all ingredients combine thoroughly. This solution will effectively remove grime without leaving streaks, making your floors shine.
Now, you’re ready to elevate your cleaning game!
Pre-Cleaning: Clearing the Space
Once you’ve prepared your cleaning solution, it’s time to clear the space in your kitchen. A clutter-free area makes for an efficient cleaning session.
Start by removing items that can obstruct your path and hinder the cleaning process.
- Clear off countertops of small appliances and decor.
- Move chairs and tables to create an open floor space.
- Gather any stray items—dishes, utensils, or trash—into designated spots.
- Don’t forget to roll up any rugs or mats that might trap dirt.
The Innovative Cleaning Technique
An innovative cleaning technique can transform your kitchen floors without the hassle of a mop. Instead of traditional methods, grab a spray bottle, a microfiber cloth, and a suitable floor cleaner.
Start by spraying a fine mist of the cleaner directly onto a section of your floor. Then, use your microfiber cloth to wipe in a circular motion, targeting areas that need extra attention.
This approach allows you to control the amount of cleaner applied, preventing buildup and ensuring a streak-free finish. By working in small sections, you’ll maintain efficiency and achieve excellent results.
Embrace this method to elevate your cleaning routine, leaving your floors sparkling and inviting without the backache of mopping.
Spot Treatment for Stubborn Stains
Sometimes, stubborn stains can be the bane of your kitchen floor’s existence. You need a targeted approach to tackle these pesky marks effectively.
Here’s how to perform a spot treatment that’ll leave your floor looking pristine:
-
Identify the stain: Determine whether it’s grease, food, or another culprit.
-
Choose your cleaner: Use a pH-balanced solution or a mix of vinegar and water for natural cleaning power.
-
Apply and let sit: Dampen a cloth with your chosen cleaner and apply it directly to the stain, allowing it to sit for a few minutes.
-
Scrub gently: Use a soft-bristle brush to work the cleaner into the stain, then wipe clean with a damp cloth.
With these steps, you’ll conquer stubborn stains like a pro!
Drying and Finishing Touches
Once you’ve tackled those stubborn stains, it’s time to focus on drying and adding those finishing touches.
You can use air drying techniques to guarantee your floors dry evenly, then follow up with a final polish for that extra shine.
To avoid streaks, consider some streak-free solutions that will leave your kitchen floor sparkling clean.
Air Drying Techniques
Although mopping is a common cleaning method, air drying your kitchen floors can leave them sparkling without the hassle.
Embrace these techniques for ideal results:
-
Natural Ventilation: Open windows or doors to enhance airflow, speeding up the drying process.
-
Strategic Fans: Positioning a fan in the kitchen directs air flow and helps evaporate moisture quickly.
-
Microfiber Cloths: Use these lightweight cloths to absorb excess water, promoting a streak-free finish.
-
Sunlight Exposure: If you’ve got sunlit areas, allow your floors to bask in natural light, which can help with drying and sanitizing.
Final Polish Methods
As you finish drying your kitchen floors, contemplate employing a few final polish methods to enhance their shine and cleanliness. A well-executed polish can elevate your floors to a new level of brilliance. Here are some methods to contemplate:
| Method | Benefits | Tips |
|---|---|---|
| Vinegar Solution | Natural shine and deodorizer | Mix 1 part vinegar with 3 parts water |
| Olive Oil Spray | Deep gloss and protection | Use sparingly for best results |
| Microfiber Cloth | Lint-free finish | Wipe in circular motions |
Streak-Free Solutions
After applying your final polish methods, it’s time to focus on achieving a streak-free finish.
Mastering these techniques will elevate your kitchen floors to a whole new level. Here’s how to guarantee a flawless shine:
-
Use a microfiber cloth****: It’s effective at trapping dirt and moisture without leaving behind fibers.
-
Wipe in a circular motion****: This technique helps to distribute the polish evenly and minimizes streaks.
-
Work in small sections****: Focusing on one area at a time prevents drying before you’ve had a chance to buff it.
-
Finish with a dry cloth: Buffing the surface with a clean, dry cloth will enhance shine and eliminate any residual dampness.
Maintaining Sparkling Floors
To keep your kitchen floors sparkling, you need to establish a consistent cleaning routine that prevents dirt and grime buildup.
Start by sweeping or vacuuming daily to remove debris and crumbs. Focus on high-traffic areas, like near the fridge and sink, where spills are likely.
Next, set aside time weekly for a deeper clean using your preferred method, whether it’s a spray solution or a homemade cleaner. Don’t forget to pay attention to corners and edges where dirt often hides.
If you notice any stains, tackle them immediately to avoid long-term damage.
Finally, consider using floor mats near entry points to catch dirt before it reaches your floors.
Consistency is key to maintaining that sparkling finish you desire.
Additional Tips for a Pristine Kitchen
Keeping your kitchen floors clean is just one part of achieving a pristine kitchen.
To elevate your space further, focus on these essential tips:
-
Declutter regularly: Keep countertops clear by storing items in their designated places.
-
Wipe surfaces daily: Use a microfiber cloth to remove crumbs and spills promptly.
-
Organize your pantry: Arrange items by category and label containers for easy access.
-
Deep clean appliances: Schedule a monthly deep clean for your oven and refrigerator to prevent buildup.
Frequently Asked Questions
Can I Use This Method on Hardwood Floors?
Yes, you can use this method on hardwood floors, but make certain you adjust the solution’s concentration. Always test a small area first to verify it won’t damage the finish or wood. Happy cleaning!
How Often Should I Clean My Kitchen Floors?
You should clean your kitchen floors at least once a week to maintain their sparkle and hygiene. If your kitchen sees heavy traffic or spills, consider cleaning more frequently to keep everything looking pristine.
What if My Floors Are Still Sticky After Cleaning?
If your floors are still sticky after cleaning, double-check your cleaning solution’s residue. You might need to rinse with water or use a vinegar solution. Always make sure you’re not overusing product; less is often more.
Are There Any Eco-Friendly Cleaning Solution Options?
You can use vinegar and water for a natural solution, or try baking soda mixed with essential oils. Both options are effective, eco-friendly, and safe for your family while giving your floors a fresh shine.
Can I Use a Vacuum Before Cleaning My Floors?
Yes, you can definitely use a vacuum before cleaning your floors. It effectively removes dust and debris, ensuring your cleaning solution works better. Just make sure to vacuum thoroughly for ideal results before applying any cleaner.