How to Make an All-Natural Toilet Bomb That Actually Works
To make an all-natural toilet bomb that actually works, mix equal parts baking soda and citric acid in a bowl. Add cornstarch for binding, and essential oils for fragrance and antibacterial properties. Gradually add water until it resembles wet sand, then pack the mixture into molds. Allow them to harden for a few hours. Store in an airtight container in a cool, dry place. Curious about the perfect technique and more tips? There’s plenty more to discover!
Key Takeaways
- Combine baking soda, citric acid, and cornstarch for effective cleaning and binding in your toilet bombs.
- Add essential oils for pleasant scents and antibacterial properties to enhance the cleaning process.
- Mix dry and wet ingredients gradually to prevent fizzing before packing them into molds tightly.
- Let the bombs harden for several hours in an airtight container to maintain their fizzing capacity.
- Use regularly for toilet maintenance, allowing the bomb to dissolve for 10-15 minutes before scrubbing.
Understanding the Ingredients Needed
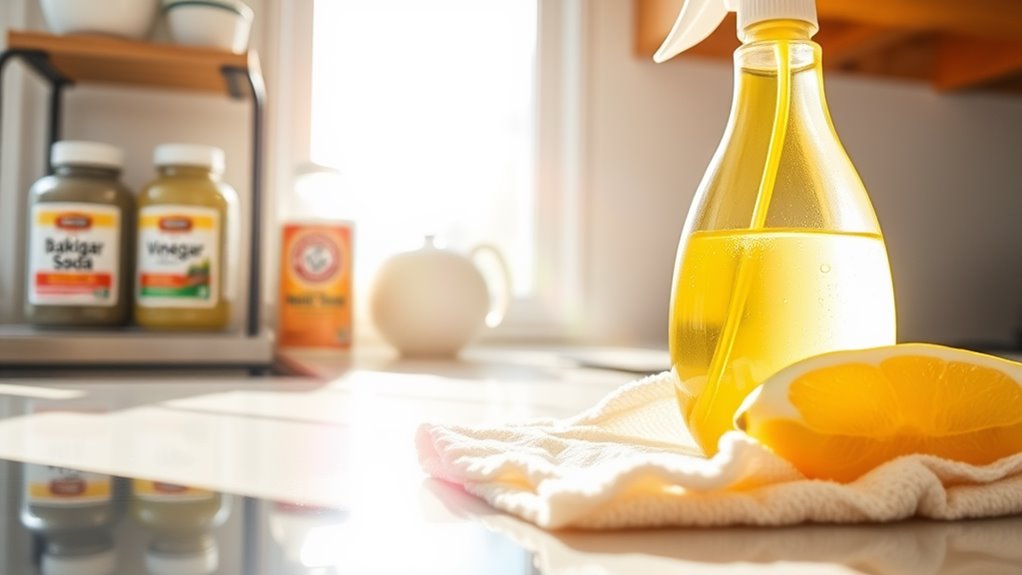
To create your all-natural toilet bombs, you’ll need a few key ingredients that pack a powerful punch against grime and odors.
Start with baking soda, which acts as a natural abrasive, scrubbing away stubborn stains. Next, grab citric acid; it’s essential for that fizzing reaction that helps dissolve dirt and leaves your toilet smelling fresh. Additionally, homemade cleaners can be more cost-effective than commercial options, making them a smart choice for budget-conscious individuals. Using safe and effective ingredients is crucial for maximizing cleaning power without harming your environment, as natural disinfectants can effectively eliminate bacteria and germs. By opting for natural cleaning options, you contribute to a healthier home and planet.
You’ll also want essential oils like tea tree or lavender for their antibacterial properties and delightful fragrances. Don’t forget about cornstarch; it binds everything together and guarantees your toilet bomb holds its shape.
Finally, hydrogen peroxide can serve as an additional disinfectant. Mastering these ingredients will set you on the path to creating effective toilet bombs that elevate your cleaning routine. Additionally, using natural ingredients is key to ensuring a safe and eco-friendly cleaning method.
Step-by-Step Instructions for Making Toilet Bombs
Now that you know the ingredients you’ll need, it’s time to get started on making your toilet bombs. You’ll follow some simple mixing instructions to create the perfect fizzing effect. Plus, I’ll share tips on how to store them for ideal freshness. Using natural ingredients not only helps in creating an effective cleaner but also promotes an eco-friendly cleaning solution that avoids harsh chemicals. Additionally, incorporating natural anti-mold ingredients can further enhance the cleanliness of your toilet by preventing mold growth. By choosing these natural components, you are contributing to a greener cleaning process that is safer for both your family and the environment. Creating your toilet bombs with natural ingredients can also help reduce your household’s chemical footprint. Furthermore, using everyday ingredients for cleaning can often be just as effective as commercial products while being more cost-efficient.
Ingredients You’ll Need
Gathering the right ingredients is essential for making effective all-natural toilet bombs. Start with one cup of baking soda, which acts as the foundation for your bomb.
Next, you’ll need half a cup of citric acid; this ingredient creates that satisfying fizz. Add a quarter cup of Epsom salt for its cleaning properties and to soften the water.
Don’t forget about essential oils—choose your favorite scent, like lemon or lavender, and use about ten drops for a revitalizing aroma.
Finally, grab a spray bottle filled with water to help bind your mixture. With these ingredients prepped, you’ll be ready to create toilet bombs that not only clean but also invigorate your bathroom experience.
Mixing Instructions
With your ingredients ready, it’s time to mix everything together for your all-natural toilet bombs. Start by combining the dry ingredients in a large bowl. Use a whisk to guarantee everything blends evenly. Next, slowly add your wet ingredients, mixing constantly to prevent fizzing. Once the mixture reaches a consistency similar to wet sand, pack it tightly into your molds. Let them sit for a few hours to harden completely. Here’s a quick reference table to guide you through the process:
| Step | Action |
|---|---|
| 1 | Combine dry ingredients |
| 2 | Whisk to blend |
| 3 | Add wet ingredients slowly |
| 4 | Pack into molds and let harden |
Enjoy mastering your toilet bomb creation!
Storage Tips
To keep your all-natural toilet bombs fresh and effective, proper storage is key.
Begin by placing your bombs in an airtight container; this prevents moisture from compromising their fizzing power. Glass jars with tight lids work excellently, but you can also use plastic containers if they seal well.
Make certain the container is stored in a cool, dry location away from direct sunlight, as heat and humidity can degrade the ingredients.
If you’re using essential oils, consider adding a few drops of the same oil to a cotton ball and placing it in the container for added freshness.
Finally, label the container with the date you made the bombs, so you’ll know when it’s time to make a new batch.
Tips for Storing Your Toilet Bombs
When it comes to storing your toilet bombs, choosing the right container is key.
Opt for an airtight jar or a resealable bag to keep them fresh and effective.
Make sure to keep them away from moisture to prevent any fizzing before you’re ready to use them.
Ideal Storage Container
Choosing the right storage container for your toilet bombs is essential to maintaining their effectiveness and longevity.
Opt for an airtight container made of glass or high-quality plastic. These materials resist odors and won’t react with your ingredients, ensuring your bombs stay potent. Clear containers let you easily monitor your supply, while darker options protect your creations from light exposure, preserving their efficacy.
Be sure the container is large enough to hold your bombs without cramming them together, which could cause breakage.
Label the container with the date of creation to track freshness. Finally, keep it in a cool, dry place, away from direct sunlight, to maintain the integrity of your all-natural toilet bombs.
Keep Away From Moisture
Moisture can quickly ruin your toilet bombs, so it’s important to store them in a dry environment.
To guarantee they stay effective, follow these tips:
-
Use Airtight Containers*: Store your bombs in airtight jars or bags to prevent any *moisture from seeping in.
-
Keep Away from Humid Areas*: Avoid placing them in bathrooms or kitchens where humidity levels are high; opt for a *cool, dry cupboard instead.
-
Add Silica Gel Packs: Including silica gel packets in your storage container can absorb any excess moisture, maintaining the bombs’ integrity.
How to Use Your Toilet Bombs Effectively
To use your toilet bombs effectively, drop one directly into the bowl after flushing. This guarantees that the water level is ideal for the bomb to fizz and activate its cleaning properties.
Allow it to dissolve completely, which typically takes around 10 to 15 minutes. While waiting, take advantage of the time by cleaning other areas of your bathroom. Additionally, using natural ingredients can enhance the effectiveness of your cleaning routine. For an extra boost, consider DIY cleaning solutions that can also help sanitize other surfaces in your bathroom. Remember to focus on areas where dirt can accumulate, such as disassembling the seat hinges, to ensure a thorough clean. Using natural disinfectants can further promote a healthier environment in your home. Incorporating steam cleaning methods can also help eliminate stubborn germs and bacteria in your bathroom.
Once the bomb has fully dissolved, scrub the bowl with a toilet brush to guarantee even coverage of the cleaning agents. Finally, flush again to rinse away any remaining residue.
For best results, use your toilet bombs weekly or as needed, especially after heavy usage. By following these steps, you’ll maintain a fresh and clean toilet with ease.
Benefits of Using All-Natural Toilet Bombs
While many cleaning products contain harsh chemicals, all-natural toilet bombs offer a safer and more eco-friendly alternative. By using these toilet bombs, you can enjoy several key benefits:
-
Healthier Home: You reduce exposure to toxic substances, promoting a cleaner environment for you and your family.
-
Eco-Friendly: Natural ingredients break down easily, minimizing harm to aquatic life and reducing your carbon footprint.
-
Cost-Effective: Making your own toilet bombs saves money over time compared to purchasing commercial cleaners filled with synthetic chemicals.
Embracing all-natural toilet bombs not only enhances your cleaning routine but also aligns with a sustainable lifestyle.
You’ll feel empowered knowing you’re making a positive impact on your health and the planet.
Troubleshooting Common Issues With Toilet Bombs
If you encounter issues with your all-natural toilet bombs, don’t worry; troubleshooting these problems is often straightforward.
First, if your bombs aren’t fizzing as expected, check the moisture content. Too much liquid can prevent activation, so make sure your mixture is crumbly but holds together when squeezed.
If they crumble instead of forming solid shapes, try adding a bit more binding agent like coconut oil.
For a lingering odor, incorporate essential oils for a fresh scent and antibacterial properties.
Finally, if stains persist, you may need to adjust the ratio of baking soda to citric acid.
Master these adjustments, and you’ll create effective toilet bombs that clean and deodorize effortlessly.
Frequently Asked Questions
Can I Customize the Scent of My Toilet Bombs?
Absolutely, you can customize the scent of your toilet bombs! Just experiment with different essential oils or fragrance oils, mixing them to achieve your desired aroma. Have fun creating a unique scent that suits your preferences!
How Long Do Homemade Toilet Bombs Last?
Homemade toilet bombs typically last around six months when stored in a cool, dry place. To maximize their shelf life, make certain they’re kept away from moisture, which can cause them to lose their effectiveness.
Are Toilet Bombs Safe for Septic Systems?
Yes, toilet bombs can be safe for septic systems, but you need to guarantee they’re made with natural ingredients. Avoid harsh chemicals that disrupt bacterial balance, and your system will stay healthy and functioning well.
Can I Use Colored Ingredients in My Toilet Bombs?
You can definitely use colored ingredients in your toilet bombs, but make certain they’re non-toxic and safe for your plumbing. Natural colorants like beet powder or spirulina work beautifully without risking stains or harm to your system.
What Happens if the Toilet Bomb Doesn’T Fizz?
If your toilet bomb doesn’t fizz, it likely means the ingredients weren’t mixed properly or moisture compromised the reaction. Check your ratios and verify everything’s dry before attempting again for a successful effervescent experience.