This DIY Spray Makes My Windows Sparkle in Seconds
This DIY spray makes your windows sparkle in seconds! Mix one cup of white vinegar with two cups of distilled water and add a few drops of dish soap. Pour it into an HDPE or glass spray bottle. For streak-free results, use a microfiber cloth and clean in a figure-eight motion. The best time for washing windows is early morning or late afternoon. Want to learn more about tips and techniques for perfect windows?
Key Takeaways
- Combine two cups of distilled water and one cup of white vinegar for an effective, streak-free cleaning solution.
- Use a spray bottle made of HDPE or glass to avoid harmful chemical reactions.
- Apply the solution using a microfiber cloth in a figure-eight motion for thorough coverage.
- Clean windows during early mornings or late afternoons to avoid glare and streaking.
- Always wear gloves and ensure good ventilation while using homemade cleaning products for safety.
Essential Ingredients for the DIY Window Spray
To make an effective DIY window spray, you’ll need just a few essential ingredients that are likely already in your home. Start with white vinegar, which cuts through grime and leaves glass streak-free. Vinegar is known for its natural cleaning properties, making it an excellent choice for homemade cleaners. Additionally, vinegar’s acidity helps to break down tough residues, further enhancing its cleaning effectiveness. By using eco-friendly ingredients, you contribute to a healthier environment while achieving a pristine shine. Using vinegar in cleaning solutions is also a common practice in DIY cleaning recipes, showcasing its versatility.
Next, grab some water—distilled is best, but tap works fine. You’ll also want to include a few drops of dish soap to enhance cleaning power. If you prefer a fresh scent, consider adding essential oils like lemon or lavender. This combination not only guarantees your window spray is powerful but also eco-friendly. Additionally, using a streak-free technique when applying your cleaner ensures the best results.
Mix these ingredients in a spray bottle, and you’re set to achieve sparkling results. Mastering this simple recipe enables you to tackle window cleaning efficiently and effectively, transforming your space with minimal effort.
Preparing the Cleaning Solution
Preparing your DIY window spray is a straightforward process that takes just a few minutes. Start by gathering your essential ingredients: distilled water, white vinegar, and a few drops of dish soap.
In a clean mixing bowl or container, pour in two cups of distilled water, followed by one cup of white vinegar. The vinegar’s acidity effectively cuts through grime and streaks, while the dish soap adds extra cleaning power. Additionally, using natural cleaning methods can enhance the effectiveness of your solution. This vinegar-based cleaner is not only effective but also eco-friendly and budget-conscious. To further improve your cleaning results, consider using eco-friendly all-purpose cleaners that can tackle various surfaces in your home. Vinegar is also known for its antimicrobial properties, making it a great choice for disinfecting surfaces.
Stir the mixture gently to combine the ingredients without creating excessive bubbles. Once blended, your cleaning solution is ready to use. This simple yet effective formula guarantees your windows will shine with minimal effort. Mastering this preparation is key to achieving crystal-clear results every time you clean. Additionally, using common household ingredients not only saves money but also reduces your environmental impact.
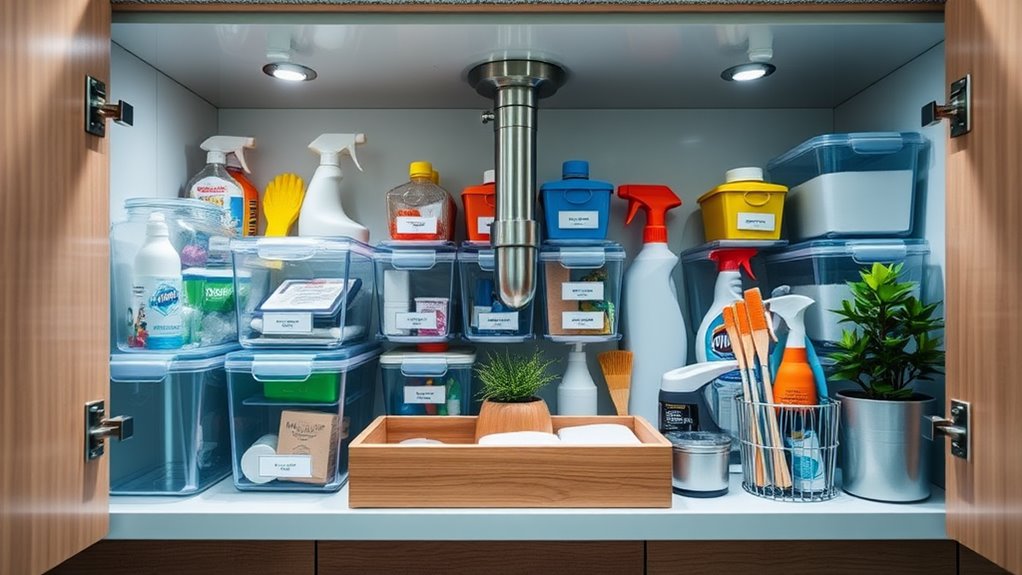
Choosing the Right Spray Bottle
When you’re picking a spray bottle for your DIY window cleaner, consider the material first—some options hold up better than others. Additionally, using a bottle made from recyclable materials can contribute to an eco-friendly cleaning routine. When selecting a bottle, opt for one that is compatible with natural disinfectant sprays to maximize the effectiveness of your cleaning routine. Using natural disinfectants not only helps in reducing harmful chemicals in your home but also promotes environmental sustainability. For instance, using bottles made from post-consumer recycled plastics can further enhance your commitment to sustainability. Lastly, ensure the bottle is made from non-toxic materials to keep your household safe while cleaning. Next, think about the nozzle type; you want one that gives you control over the spray pattern. Finally, choose a size and capacity that fits your cleaning needs without being too bulky.
Material Considerations
Choosing the right spray bottle is essential for your DIY window spray, as the material can greatly impact the effectiveness and safety of your cleaning solution.
Opt for a bottle made of high-density polyethylene (HDPE) or glass; both are durable and resistant to various cleaning agents. Avoid using PVC bottles, as they can leach harmful chemicals into your solution.
If you’re using vinegar or essential oils, glass is preferable since it won’t react with these substances. Make certain the bottle is opaque or tinted to protect your solution from light exposure, which can degrade its potency.
Finally, choose a bottle with a comfortable grip and a wide mouth for easy filling and cleaning. Your choice of material directly influences your cleaning success!
Nozzle Type Selection
After selecting the right material for your spray bottle, it’s time to focus on the nozzle type.
The nozzle you choose can greatly impact the efficiency of your window cleaning. Consider these options to elevate your DIY experience:
- Adjustable Nozzles: Allows you to customize the spray pattern, from mist to stream.
- Fan Nozzles: Great for covering large areas quickly without wasting solution.
- Trigger Sprayers: Provide comfortable grip and precise control over the amount released.
- Continuous Spray Nozzles: Perfect for even, sustained application with minimal effort.
Selecting the right nozzle enhances your cleaning process, ensuring that your windows sparkle effortlessly.
Mastering this small detail can save you time and yield exceptional results.
Size and Capacity
Finding the right size and capacity for your spray bottle is essential for effective window cleaning. You’ll want a bottle that comfortably fits in your hand, typically ranging from 16 to 32 ounces.
A smaller bottle’s easier to maneuver for quick touch-ups, while a larger one can save you time on refills for extensive tasks. Consider the volume of cleaning solution you’ll need; if you’re tackling multiple windows or large panes, opt for a bottle with a greater capacity.
Additionally, guarantee the bottle’s capacity matches your cleaning frequency. For daily use, a mid-sized bottle strikes a balance between efficiency and convenience.
Ultimately, choosing the right size enhances your cleaning experience, guaranteeing you achieve sparkling windows with minimal effort.
Tips for Streak-Free Application
To achieve a streak-free shine on your windows, focus on your wiping technique and the materials you use.
Opt for lint-free cloths, like microfiber, which trap dirt without leaving residue.
Proper Wiping Technique
When it comes to achieving a streak-free shine on your windows, the right wiping technique makes all the difference. To master this essential skill, follow these tips:
-
Use a figure-eight motion to cover the entire surface without missing spots.
-
Start at the top and work your way down; this prevents drips from marring your progress.
-
Guarantee consistent pressure across the cloth to avoid uneven streaks.
-
Finish with a clean, dry section of the cloth to buff any remaining moisture.
Best Cloth Materials
While you might think any cloth will do, choosing the right material is essential for a streak-free window finish. Microfiber cloths are your best bet; they’re designed to lift and trap dirt without scratching.
Opt for a lint-free variety to avoid leaving behind pesky fibers. Avoid paper towels, as they often leave streaks and residue. If you’re looking for an eco-friendly option, consider cotton or old T-shirts, but make sure they’re clean and free of any dyes or prints.
To master your technique, always dampen your cloth slightly before applying your DIY spray. This helps the cloth glide smoothly and prevents streaking.
With the right materials and approach, you’ll achieve crystal-clear windows in no time.
Best Time of Day to Clean Windows
Have you ever wondered what the best time of day is to clean your windows? The best moment can greatly enhance your results. Early mornings or late afternoons are ideal, as the sun’s intensity is lower, preventing streaks and quick drying.
Consider these factors when scheduling your window cleaning:
-
Temperature: Aim for mild weather to avoid extreme heat or cold.
-
Sunlight: Soft, diffused light helps you spot smudges without glare.
-
Humidity: Dry conditions allow your cleaning solution to work effectively.
-
Traffic: Choose quieter times for fewer distractions and interruptions.
Techniques for Cleaning Different Types of Glass
When cleaning glass, different techniques can make a big difference in the results.
You’ll want to guarantee your methods are safe for tinted glass while also achieving that streak-free shine.
Plus, knowing the best approach for indoor versus outdoor cleaning can save you time and effort.
Streak-Free Techniques
To achieve a streak-free shine on various types of glass, you need to tailor your cleaning techniques to suit the surface.
Different materials require specific approaches for ideal results. Consider these strategies for a flawless finish:
- Use microfiber cloths for their absorbency and lint-free properties.
- Clean in a circular motion to prevent streaks from forming.
- Apply your DIY spray sparingly; too much product can lead to buildup.
- Work in the shade to avoid rapid evaporation, which can cause streaking.
Safe for Tinted Glass
Cleaning tinted glass requires special attention to guarantee you maintain the integrity of the tint while achieving a spotless finish. Start by using a gentle, pH-balanced cleaner to avoid damaging the film. Opt for a microfiber cloth to prevent scratches and lint residue.
Here’s a quick reference table for effective tinted glass cleaning:
| Step | Action | Notes |
|---|---|---|
| 1 | Dust the surface | Use a dry microfiber cloth |
| 2 | Spray the cleaner lightly | Avoid oversaturating |
| 3 | Wipe in a circular motion | Start from the top |
| 4 | Dry with a clean cloth | Ascertain no moisture remains |
| 5 | Inspect for streaks | Repeat if necessary |
Outdoor vs. Indoor Methods
While both indoor and outdoor glass cleaning techniques share some similarities, they also require distinct approaches to tackle the unique challenges each environment presents.
Indoor cleaning often involves managing dust and streaks, while outdoor cleaning deals with dirt, grime, and weather elements.
To master these techniques, consider the following:
-
Indoor: Use a microfiber cloth to trap dust effectively and employ a gentle solution to avoid streaking.
-
Outdoor: Opt for a squeegee after applying your DIY spray, ensuring you work from top to bottom.
-
Timing: Clean on overcast days to prevent rapid evaporation, preventing streaks.
-
Tools: Invest in a long-handled squeegee for hard-to-reach outdoor areas and a small one for indoor precision.
Embrace these strategies for impeccable glass clarity.
Safety Precautions to Consider
Before you plunge into making your DIY window spray, it’s essential to contemplate a few safety precautions.
First, always wear gloves to protect your skin from potential irritation, especially if you’re using vinegar or essential oils.
Verify your workspace is well-ventilated to avoid inhaling any strong fumes.
If you have pets or children, keep your cleaning supplies out of their reach to prevent accidents.
Additionally, test your spray on a small, inconspicuous area of the window first to verify it doesn’t cause damage or streaking.
Finally, store your homemade cleaner in a labeled container, away from direct sunlight, to maintain its effectiveness.
Eco-Friendly Benefits of Homemade Cleaners
When you choose to make your own window spray, you’re not just saving money; you’re also opting for an eco-friendly solution that benefits both your home and the environment.
By utilizing natural ingredients, you minimize the impact of harsh chemicals, contributing to cleaner air and water.
Here are some key benefits of homemade cleaners:
-
Reduced Chemical Exposure: Protect your family from toxic substances found in commercial products.
-
Biodegradable Ingredients: Guarantee your cleaner breaks down naturally, leaving no harmful residues.
-
Sustainable Practices: Support eco-friendly sourcing by using common household items.
-
Customizable Formulas: Tailor your cleaner to suit specific needs and preferences, enhancing its effectiveness.
Embrace these advantages, and elevate your cleaning routine while caring for the planet.
Troubleshooting Common Cleaning Issues
Cleaning windows can sometimes lead to frustrating issues, but don’t worry—you can easily troubleshoot these common problems with a few simple tips.
If streaks appear after cleaning, try using a microfiber cloth instead of paper towels for a lint-free finish. Make sure your DIY spray is well-mixed; sometimes, residue can cause streaks too.
If your windows still seem cloudy, it might be due to hard water stains. Consider using a vinegar solution to tackle those stubborn spots. For greasy smudges, a little dish soap mixed with water can do wonders.
Finally, clean your windows on a cloudy day to prevent the sun from drying your cleaner too quickly, which can lead to streaking. Master these techniques, and enjoy crystal-clear windows!
Maintenance Tips for Sparkling Windows
To keep your windows sparkling, it’s essential to establish a regular maintenance routine that fits your lifestyle.
Consistency is key, and implementing a few simple practices can make all the difference.
- Clean windows on a cloudy day to prevent streaks from the sun.
- Use a microfiber cloth or squeegee for a streak-free finish.
- Inspect window frames and seals regularly to prevent moisture build-up.
- Apply your DIY spray every two weeks to maintain clarity and shine.
Frequently Asked Questions
How Often Should I Clean My Windows With This Spray?
You should clean your windows every few weeks to maintain clarity and shine. Regular cleaning prevents dirt buildup, ensuring your view remains unobstructed and your home looks its best. Don’t wait too long between cleanings!
Can I Use This Spray on Tinted Windows?
You can use this spray on tinted windows, but test a small area first. Some ingredients might affect the tint, so make certain it’s safe before applying it to your entire window surface. Enjoy your crystal-clear view!
Is This Spray Safe for Pets and Children?
You’ll want to check the ingredients carefully. If they’re non-toxic and safe for use around pets and children, then the spray should be fine. Always supervise their interactions with any cleaning products for added safety.
How Do I Store Leftover Cleaning Solution?
To store leftover cleaning solution, pour it into a labeled, airtight container. Keep it in a cool, dry place away from direct sunlight. Always check for any separation before using it again.
Will This Spray Remove Paint or Stickers?
This spray isn’t designed to remove paint or stickers. It effectively cleans glass surfaces but won’t tackle tougher residues. For stubborn spots, you might need a specialized solvent or adhesive remover instead.