Before and After: My Pantry Went From Chaos to Clean in 1 Hour
In just one hour, you can turn your chaotic pantry into an organized haven. Start by emptying everything out and gathering supplies like trash bags and storage bins. Sort through items, tossing expired goods and categorizing what you have. Clean shelves with the right solutions, then strategically organize contents by type. Don’t forget to label containers for quick access! If you want to see the transformation and learn more tips, keep going!
Key Takeaways
- Empty the entire pantry to confront disarray and assess all items, making it easier to identify what to keep or discard.
- Discard expired items and organize remaining foods by category, simplifying meal prep and enhancing cooking efficiency.
- Clean shelves and surfaces thoroughly, using appropriate cleaning solutions and ensuring all areas are dry to prevent moisture buildup.
- Utilize clear containers and stackable bins for maximum visibility and accessibility, optimizing space and maintaining order.
- Implement a consistent labeling system at eye level for each category to streamline access and enhance organization.
The Initial State of My Pantry
When you first open the door to your pantry, it often feels like stepping into a chaotic world of mismatched containers and forgotten snacks.
You might see half-empty bags of flour teetering on top of canned goods, while expired items linger in the shadows. This disarray not only hinders your ability to find ingredients but also complicates pantry organization. Using clear storage bins can revolutionize how you see and access your pantry items. Implementing quick wipe-downs as part of a regular routine can also help in maintaining order. Furthermore, organizing your pantry with proper labeling can further streamline your cooking process. To maximize your pantry’s potential, consider using space-maximizing methods that can help reduce waste and improve efficiency.
You know there’s potential for efficiency and clarity, but the clutter drowns it out. It’s frustrating to sift through layers of chaos, and you often find yourself asking, “Where’s that spice?”
Identifying the initial state of your pantry is essential; it’s the first step to reclaiming control, maximizing space, and transforming that chaotic world into a streamlined culinary haven. In fact, effective pantry organization can significantly enhance your cooking experience and save you time.
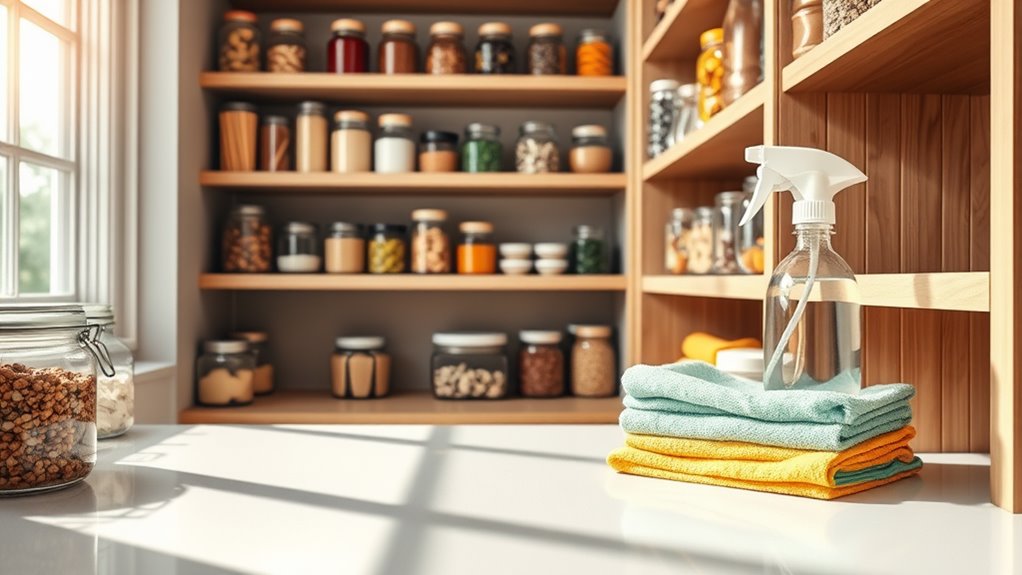
Gathering Supplies for the Declutter
Before diving into the decluttering process, you’ll need to gather a few essential supplies to make the task smoother. First, grab some sturdy trash bags for items you’re ready to discard.
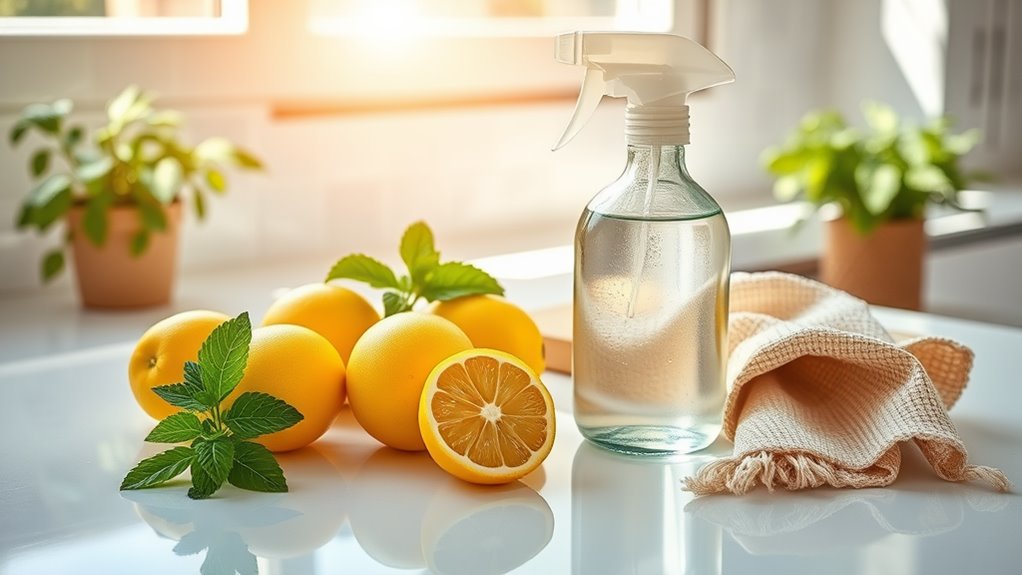
Next, have a few boxes or bins on hand for things you want to donate or relocate. A notepad and pen can help you jot down any inventory or shopping needs that arise during your declutter. Implementing a balanced weekly schedule can also help you maintain your pantry’s organization moving forward. Regular maintenance is crucial to ensure that your pantry remains functional and clutter-free over time. Additionally, utilizing quick decluttering techniques can significantly enhance your efficiency during this process. To keep your surfaces gleaming and inviting, you might also want to use microfiber cloths for effective cleaning.
Don’t forget about cleaning supplies like disinfectant wipes or a microfiber cloth to wipe down shelves once you clear them.
Finally, consider using organizers like baskets or stackable containers to maximize your space effectively. Implementing the 5-bin sorting system not only streamlines your decluttering process but also ensures that every item has a designated place in your newly organized pantry.
With these tools at your disposal, you’re well-prepared to tackle the chaos in your pantry and achieve a clean, organized space.
Emptying the Pantry: The First Step
To kick off your pantry organization, start by emptying everything out. This step may feel intimidating, but trust me, it’s essential for transforming your space. As you pull items from the shelves, prepare to confront the chaos and feel empowered.
-
Expired ingredients: Discover how much food you’ve let go to waste, and let that motivate you to do better. This realization can serve as a reminder of the importance of the “one-in-one-out” rule to prevent future waste. Regularly checking for essential weekly deep cleaning areas can help you maintain freshness in your pantry, while also ensuring you tackle overlooked household cleaning tasks that can accumulate over time. Additionally, consider using natural ingredients to clean and sanitize your pantry once you’ve emptied it out.
-
Unmatched lids: Find those lonely containers that have lost their partners, reminding you of the clutter that needs addressing.
-
Mystery items: Unearth forgotten treasures and question how they ended up in your pantry.
Once you clear the space, you’ll set the stage for a masterful organization process. Embrace this fresh start! Implementing a daily 5-minute reset routine can help maintain your newly organized pantry and prevent future chaos.
Sorting Through the Chaos
Now that you’ve emptied your pantry, it’s time to assess what you’ve got.
Start by categorizing your food items into groups like canned goods, snacks, and grains. This step will make it easier to see what you need to keep, toss, or restock.
Assessing Pantry Contents
Many people find their pantry overflowing with items they forgot they had. It’s easy to lose track of what you own amidst the clutter. To reclaim your pantry, start by evaluating your contents.
Pull everything out and face the reality of what’s there. You might discover:
- Expired items, like that half-open bag of flour from last year.
- Unused gadgets, such as a pasta maker collecting dust.
- Forgotten treasures, like a rare spice blend you loved but never used.
This process isn’t just about cleaning; it’s about understanding what you truly need. By confronting the chaos, you’ll gain clarity and make informed choices moving forward.
Embrace this moment to master your pantry and elevate your cooking experience.
Categorizing Food Items
After emptying your pantry and evaluating what you have, it’s time to bring order to the chaos by categorizing your food items. Start sorting by grouping similar items together. This method streamlines your cooking process and helps you identify what you need.
Here’s a simple guide to categorizing:
| Category | Examples | Storage Tips |
|---|---|---|
| Grains | Rice, Pasta, Quinoa | Use clear containers |
| Canned Goods | Beans, Vegetables, Soup | Stack in bins |
| Snacks | Chips, Nuts, Dried Fruit | Keep in easy reach |
Cleaning the Shelves and Surfaces
Now that you’ve sorted through the chaos, it’s time to tackle those shelves.
Start by clearing out any expired items and then wipe down the surfaces to eliminate dust and spills.
Once everything’s clean, organize your pantry by categories to make it easy to find what you need.
Clear Out Expired Items
Start by checking the expiration dates on all your pantry items—it’s surprising how many expired products can accumulate over time.
As you sift through your shelves, don’t hesitate to toss those outdated goods. Clearing out expired items not only creates space but also refreshes your cooking inspiration.
Here are three common culprits you’ll likely find:
-
Canned goods: Often forgotten, they can linger long after their prime.
-
Spices: They lose potency over time and mightn’t serve your culinary creations.
-
Baking essentials: Flour and baking powder can spoil, affecting your recipes.
Wipe Down Surfaces
Grab a damp cloth and get ready to wipe down your pantry shelves and surfaces. This essential step clears away crumbs, spills, and dust, ensuring a clean slate for your organization efforts. Start at the top and work your way down for efficiency.
| Shelf Type | Cleaning Solution |
|---|---|
| Wooden Shelves | Mild soap and water |
| Metal Shelves | Vinegar and water mix |
| Plastic Bins | All-purpose cleaner |
After wiping, dry the surfaces to prevent moisture buildup. Pay attention to corners and edges, as they often collect grime. A clean pantry not only looks appealing but also promotes a healthier cooking environment.
Organize by Categories
Once you’ve cleaned the shelves, it’s time to plunge into organizing your pantry by categories.
This step transforms chaos into an efficient system that enhances your cooking experience. Start by grouping similar items together; this not only saves time but also makes it easier to locate what you need.
Consider these categories:
-
Canned Goods – Keep your soups and vegetables together for quick meal prep.
-
Grains and Pasta – Organizing rice, quinoa, and pasta will streamline your carbohydrate choices.
-
Snacks and Treats – Designate a space for snacks to satisfy cravings without rummaging through clutter.
Choosing the Right Storage Solutions
Choosing the right storage solutions can transform your pantry from a chaotic mess into an organized haven, making it easier to find what you need.
Start by evaluating your space and inventory. Consider clear bins for dry goods; they keep items visible and accessible. Stackable containers maximize vertical space, while labeled jars add a touch of elegance and clarity.
Don’t forget about adjustable shelves, which allow you to customize heights for various items. Use pull-out baskets for easy access to frequently used ingredients. For smaller items, drawer organizers can prevent clutter.
Ultimately, the right solutions cater to your specific needs and style, creating a pantry that not only looks good but functions effectively. Invest wisely, and enjoy your newly organized space!
Organizing by Category
Organizing your pantry by category is a game-changer, making it easy to locate items and streamline meal prep.
When you categorize your pantry, you’ll feel a sense of control and efficiency. You won’t waste time searching for ingredients anymore; everything will have its place.
-
Canned Goods – No more digging through mismatched items; they’ll be neatly stacked together.
-
Grains and Pasta – Access your favorites quickly, making meal planning a breeze.
-
Snacks – Keep treats in one spot, ensuring you satisfy those cravings without chaos.
Implementing a Labeling System
After categorizing your pantry, the next step is to implement a labeling system that enhances your organization. Labels not only streamline your cooking process but also maintain order over time. You can create clear, concise labels for each category. Consider using a consistent format for easy recognition.
Here’s a simple example of how to structure your labels:
| Category | Label Example |
|---|---|
| Grains | Quinoa, Rice |
| Canned Goods | Tomatoes, Beans |
| Snacks | Nuts, Chips |
| Spices | Basil, Cumin |
Be sure to place the labels at eye level for quick access. This way, you’ll master your pantry organization, making meal prep a breeze!
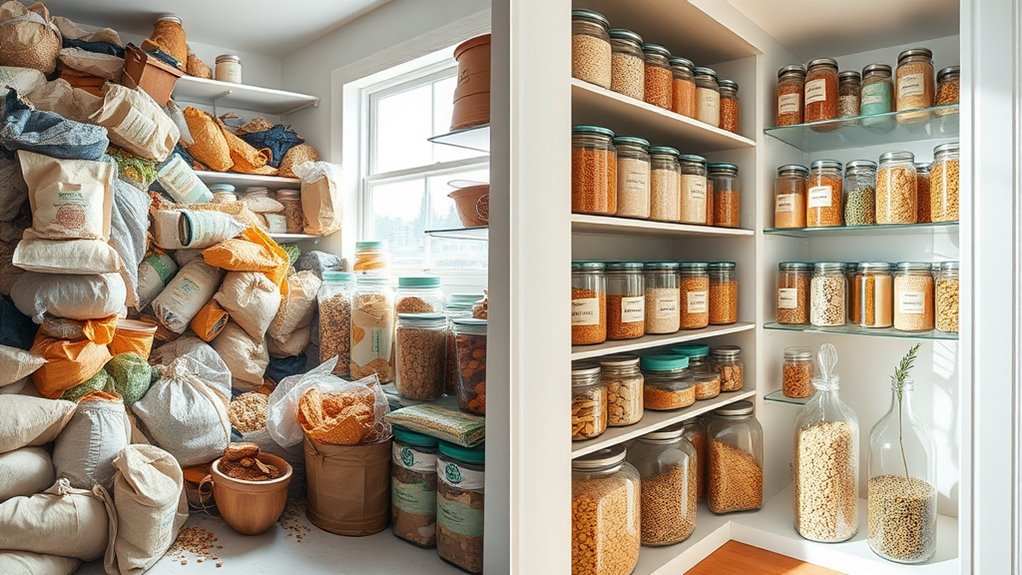
The Final Reveal: Before and After
Transforming your pantry can be a game-changer, and seeing the before and after makes all the effort worthwhile. You’ll feel a surge of satisfaction when you glimpse the organized space you’ve created. Envision this:
-
Clutter-Free Shelves: No more chaos; everything’s in its place.
-
Labeled Containers: Instantly accessible ingredients that elevate your cooking.
-
Visual Harmony: An aesthetically pleasing pantry that inspires creativity.
This transformation isn’t just about looks; it’s about efficiency and mastery in your kitchen. You’ll navigate your pantry like a pro, finding what you need without frustration.
Every time you open those doors, you’ll be reminded of the power of organization. Embrace this change and enjoy the fruits of your labor!
Maintaining the Order: Tips for Longevity
While you’ve successfully organized your pantry, keeping it that way requires a bit of ongoing effort. Start by implementing a “one in, one out” rule to prevent clutter from creeping back in.
Regularly assess your pantry; schedule a quick check every month to toss expired items and reorganize as needed. Label your containers clearly to make finding and returning items effortless.
Keep similar items together and maintain a consistent layout so you always know where things belong. Encourage family members to respect the system by educating them on the organization.
Finally, don’t hesitate to adjust your setup if you find certain areas aren’t working. With these strategies, you’ll maintain a clean and efficient pantry for the long haul.
Frequently Asked Questions
What Inspired You to Organize Your Pantry?
You’re inspired to organize your pantry when you realize a cluttered space hinders meal prep and creativity. Simplifying your environment not only saves time but also enhances your cooking experience, making it enjoyable and efficient.
How Often Should I Declutter My Pantry?
You should declutter your pantry every three to six months. Regularly check for expired items, reorganize frequently used products, and maintain a clean environment. This keeps your pantry functional and prevents chaos from creeping back in.
What Are the Best Storage Solutions for Small Pantries?
To maximize small pantry space, use stackable bins, clear containers, and tiered shelves. Label everything for easy access. Utilize door racks and vertical dividers to keep items organized and guarantee you can find what you need quickly.
Can I Organize My Pantry Without Buying New Containers?
Absolutely, you can organize your pantry without new containers! Start by repurposing jars or boxes you already own. Sort items by category, and label them clearly for easy access. It’s all about creativity and resourcefulness.
What Should I Do With Expired Food Items?
Start by checking expiration dates regularly. When you find expired food items, discard them responsibly. Consider composting organic waste and recycling packaging. This keeps your pantry fresh and helps you maintain an organized space for essentials.