This DIY Bathroom Spray Is My Secret Weapon Against Odors
This DIY bathroom spray is your secret weapon against unpleasant odors! With simple ingredients like distilled water, rubbing alcohol, and your choice of essential oils, you can create a custom blend that freshens your space. Just spray it around the toilet and odor-prone areas after each use for ideal freshness. Store it in a dark glass bottle to maintain its effectiveness. Want to discover more tips and tricks for making the perfect spray? Keep going!
Key Takeaways
- DIY bathroom sprays effectively eliminate odors by targeting the bacteria that cause them, ensuring a fresher environment.
- Custom blends using natural ingredients are safe for families and pets, enhancing air quality in bathrooms.
- Essential oils in the spray provide a pleasant fragrance while also acting as natural disinfectants.
- Regular application after each use helps maintain consistent freshness and odor control in the bathroom.
- Storing the spray in a dark glass bottle preserves its effectiveness and protects the ingredients from light degradation.
Understanding Bathroom Odors
Bathroom odors can be a nuisance, especially when you’re trying to relax or entertain guests. Understanding these odors is vital for effective management. They often stem from bacteria breaking down organic waste, leading to unpleasant smells. The use of natural cleaners can help reduce the bacteria responsible for these odors. Additionally, using a natural deodorizing spray can neutralize odors without introducing harsh chemicals into your space. Incorporating pet-safe natural cleaning solutions can further ensure that your cleaning methods are safe for your furry companions. A DIY spray made with essential oils not only combats odors but also leaves a refreshing scent behind.
Factors like humidity, poor ventilation, and accumulated debris can exacerbate the issue. When you’re aware of the root causes, you can take targeted actions to mitigate them. Utilizing a bathroom spray can be an immediate solution, masking odors while you address the underlying problems. However, it’s important to remember that a spray alone won’t eliminate the source. Natural methods for maintaining freshness can further enhance your bathroom environment.
Combining this knowledge with proactive cleaning and maintenance guarantees your bathroom remains a revitalizing space, free from unwanted scents that detract from your comfort and enjoyment.
Benefits of DIY Bathroom Sprays
Finding effective solutions to combat bathroom odors not only improves your comfort but also enhances the overall atmosphere of the space. DIY bathroom sprays empower you to take control of your environment, allowing you to create a revitalizing and inviting experience. With your custom blend, you eliminate unpleasant scents while showcasing your personal style and preferences.
- Feel confident inviting guests into your home without worry.
- Experience the satisfaction of crafting a solution tailored just for you. Incorporating pet-safe cleaning products can also ensure that your solution is safe for all family members, including furry friends. Additionally, using simple DIY freshening tips can provide ongoing freshness and keep odors at bay.
- Enjoy the peace of mind that comes with using natural ingredients. Additionally, incorporating natural anti-mold solutions can help prevent mold growth, further improving your bathroom’s air quality. Using diluted essential oils in your spray can also enhance the freshness without the use of harsh chemicals. Moreover, combining your spray with preventive measures against shower mold can create a healthier bathroom environment.
Essential Ingredients for Your Spray
Creating an effective DIY bathroom spray starts with choosing the right ingredients.
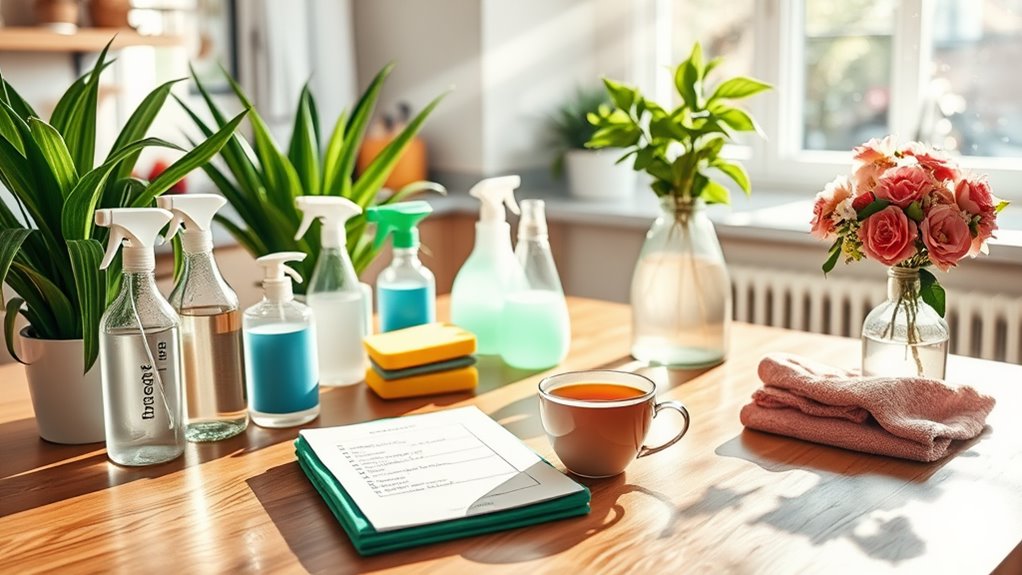
You’ll want to start with distilled water as your base, ensuring a clean and pure solution. Adding a high-proof alcohol, like vodka, helps to eliminate odors and acts as a disinfectant. Homemade bathroom cleaners can be just as effective as store-bought options, often without the harsh chemicals. In fact, eco-friendly cleaners are known to be safer for both your health and the environment. Using natural ingredients not only benefits your space but also reduces your ecological footprint. Moreover, utilizing natural disinfectants can enhance the spray’s ability to kill germs, making it a dual-purpose solution.
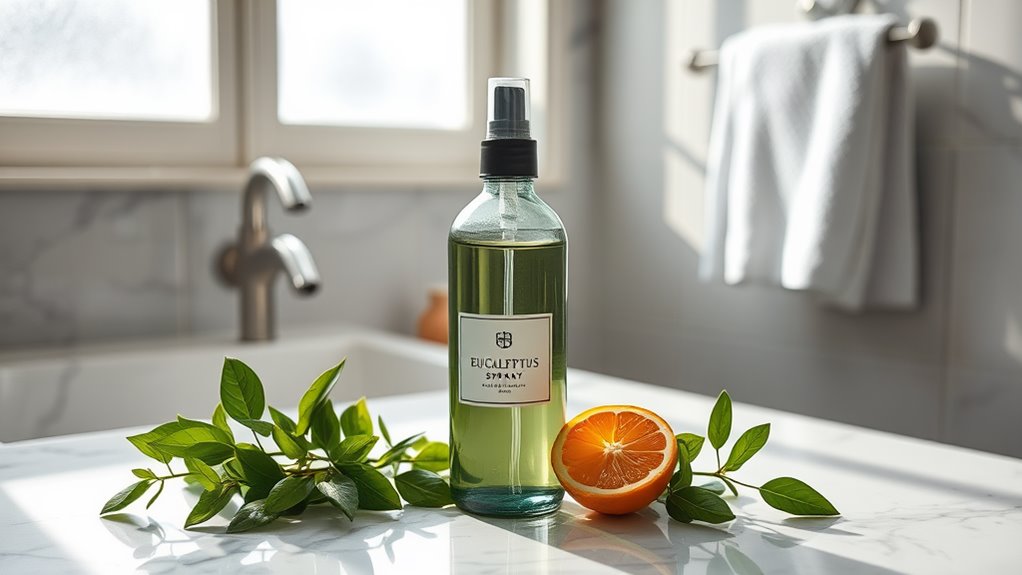
Essential oils play a vital role, too; options like lavender, eucalyptus, or lemon not only mask unpleasant scents but also provide therapeutic benefits. Additionally, incorporating a natural disinfectant can enhance the spray’s ability to kill germs.
You might also consider adding a few drops of dish soap to help the solution cling to surfaces longer, enhancing its effectiveness.
By carefully selecting these components, you can craft a powerful spray that tackles odors head-on, transforming your bathroom experience into a fresh and inviting space.
Master these elements for best results.
Step-by-Step Recipe for the Perfect Spray
Now that you know the essential ingredients for your DIY bathroom spray, it’s time to put them to use.
You’ll find that mixing these components is easier than you think.
Let’s simplify the process so you can create the perfect spray in no time!
Essential Ingredients Needed
To craft the perfect bathroom spray that combats odors effectively, you’ll need a few essential ingredients.
These components not only neutralize unpleasant smells but also provide a rejuvenating atmosphere that elevates your bathroom experience.
-
Distilled water: This serves as the base, ensuring a clean, pure solution.
-
Essential oils: Choose your favorites, like lavender or eucalyptus, to create an inviting scent that calms and soothes.
-
White vinegar: A natural deodorizer that eliminates odors at the source, leaving your space feeling fresh and clean.
Gathering these ingredients empowers you to take control of your bathroom’s fragrance.
Mastering this recipe won’t only enhance your space but also impress your guests with your DIY prowess.
Mixing Instructions Simplified
Mixing your bathroom spray is a straightforward process that takes just a few minutes. Follow these simple steps to create your powerful odor-fighting solution.
| Ingredient | Amount |
|---|---|
| Distilled Water | 1 cup |
| Rubbing Alcohol | 1/2 cup |
| Essential Oil (e.g., lavender) | 15-20 drops |
Start by measuring the distilled water, then pour it into a clean spray bottle. Next, add the rubbing alcohol to the bottle. Finally, drop in your chosen essential oil for a pleasant scent. Secure the spray top and shake gently to combine. With these steps, you’ll have a potent bathroom spray ready to tackle any odors effortlessly. Enjoy your mastery of a fresh-smelling space!
How to Properly Mix Your Ingredients
Creating your DIY bathroom spray requires careful attention to how you combine your ingredients.
Start by measuring your essential oils accurately, as even a slight variation can affect the fragrance.
Mix them in a clean spray bottle, adding water and a small amount of alcohol to enhance the scent’s longevity.
- Feel the satisfaction of crafting something effective.
- Experience the joy of a fresh, inviting bathroom.
- Gain confidence in your ability to combat odors naturally.
Tips for Application and Usage
Once you’ve mixed your ingredients, it’s time to put that DIY bathroom spray to good use. Aim for a thorough spray around the toilet and any areas prone to odors. Aiming for the air just above the toilet bowl can effectively trap any unpleasant scents.
Don’t forget to apply the spray after each use; consistency is key. For maximum effectiveness, allow the spray to settle for a few moments before using the bathroom.
If you’re hosting guests, consider a preemptive spray to neutralize odors before they arise. Experiment with different application techniques to find what works best for you.
With practice, you’ll master the art of odor control, keeping your bathroom fresh and inviting at all times.
Storing Your DIY Bathroom Spray
To keep your DIY bathroom spray effective, choose the right storage container.
Opt for a dark glass bottle to protect the ingredients from light and heat.
Store it in a cool, dry place to guarantee it lasts as long as possible.
Best Storage Containers
When it comes to storing your DIY bathroom spray, choosing the right container can make a big difference in both functionality and aesthetics.
Opt for a sleek, spray-top bottle that fits seamlessly into your bathroom decor. Glass containers not only look elegant but also preserve the quality of your ingredients. You might also consider amber or cobalt bottles to protect your spray from light degradation.
Here are three must-have features for your storage container:
- Durability: A sturdy container withstands daily use and lasts longer.
- Ease of Use: A simple spray nozzle guarantees effortless application.
- Visual Appeal: An attractive design enhances your bathroom’s ambiance.
With the right container, you’ll elevate your bathroom experience while mastering odor control!
Ideal Storage Locations
Finding the right spot for your DIY bathroom spray can enhance its effectiveness and accessibility. Consider these ideal locations to store your spray, ensuring it’s within easy reach when you need it most.
| Location | Advantages | Tips |
|---|---|---|
| Under the Sink | Discreet and convenient | Use a labeled container |
| Bathroom Shelf | Visible and accessible | Keep away from heat |
| Cabinet Door | Saves counter space | Use a hook for hanging |
| Near Toilet | Quick access for emergencies | Choose a stylish design |
Comparing DIY Sprays to Commercial Products
While many people rely on commercial products to tackle bathroom odors, DIY sprays can offer a more personalized and cost-effective solution.
You gain full control over the ingredients, allowing you to create a scent that resonates with your preferences.
Plus, you can customize the potency to match your specific needs, ensuring no odor stands a chance.
- Experience the satisfaction of crafting your own solution.
- Enjoy peace of mind knowing exactly what’s in your spray.
- Save money while achieving effective odor elimination.
Additional Natural Deodorizing Methods
Although DIY sprays are a fantastic option for combating bathroom odors, there are several additional natural deodorizing methods you can explore.
Try placing an open box of baking soda in your bathroom; it absorbs moisture and neutralizes odors effectively. Activated charcoal is another powerful option; its porous nature traps unwanted smells.
You can also utilize white vinegar—leave a bowl of it out to absorb odors, or wipe surfaces with a vinegar solution. Fresh herbs, like mint or rosemary, can act as natural air fresheners when placed in a decorative container.
Finally, consider using citrus peels; they not only smell great but also release natural oils that help combat bad scents.
Personalizing Your Spray With Essential Oils
To create a bathroom spray that truly reflects your personal style, incorporating essential oils is a fantastic way to customize the scent. Choose oils that resonate with your mood or desired ambiance.
Here are some ideas to inspire you:
-
Lavender: Promotes relaxation and tranquility, making your bathroom a serene escape.
-
Peppermint: Invigorates the senses, adding a revitalizing and clean vibe to the space.
-
Citrus (like lemon or orange): Uplifts and energizes, ensuring your bathroom feels bright and welcoming.
Experiment with different blends to discover combinations that resonate with you.
Frequently Asked Questions
How Long Does the DIY Bathroom Spray Last Before Needing to Be Replaced?
The DIY bathroom spray typically lasts about two to four weeks, depending on usage and storage conditions. You’ll want to check it regularly and replace it when the scent diminishes or if it becomes discolored.
Can I Use This Spray on Surfaces Other Than the Bathroom?
Yes, you can definitely use this spray on other surfaces! It’s effective on countertops, fabrics, and even in your car. Just test a small area first to guarantee it doesn’t affect the material’s color or texture.
Is This Spray Safe for Pets and Children?
You’ll want to guarantee safety for pets and children before using any spray. Generally, if you’re using natural ingredients, it’s safer, but always test a small area first and keep the space well-ventilated.
What Should I Do if I’M Allergic to Certain Essential Oils?
If you’re allergic to certain essential oils, avoid them completely. Instead, explore alternatives like hydrosols or fragrance-free options. Always test a small amount on your skin first to guarantee there are no adverse reactions.
Can I Adjust the Scent Strength in My DIY Bathroom Spray?
Absolutely, you can adjust the scent strength in your DIY bathroom spray. Just modify the amount of essential oil you use; add more for a stronger scent or reduce it for a lighter fragrance.